今天就是一年一度的父親節囉!!讀者們想好要送什麼給最親愛的老爸了嗎?
刮鬍刀,恩,老爸好像已經有了;領帶(搔搔頭),不知道要選什麼款式好?吃大餐,好像會發胖耶;按摩椅,似乎有點超出預算。那⋯⋯就用Scratch來幫老爸設計設計一張互動式卡片好了!
會不會很難啊?沒問題,就讓我們CAVEDU教育團隊一步步引導您吧!Let us code.
| 作者/攝影 |
撰寫:宗諭
圖片:pixabay
|
| 文章分類 |
教學技術文 |
| 時間 |
1hr |
| 成本 |
|
| 難度 |
*(1-10) |
Step1:先申請一個Scratch帳號。透過建立Scratch帳號,我們可以在Scratch中「分享、儲存」所有的專案。
[caption id="attachment_24922" align="aligncenter" width="726"]
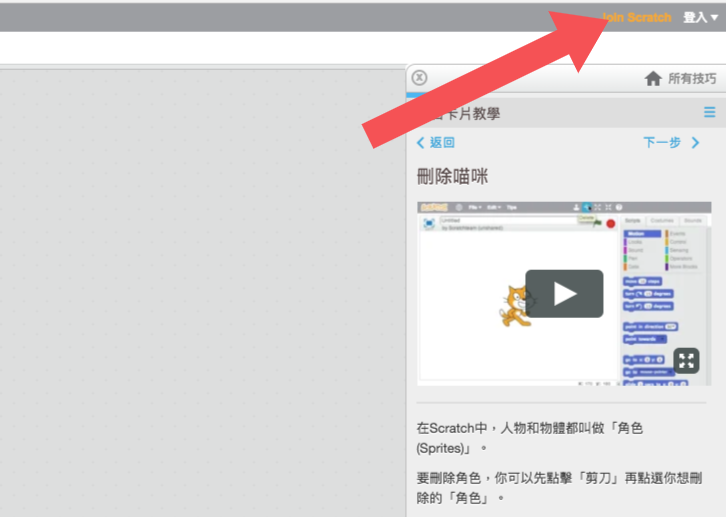
圖1[/caption]
Step2:點選「Join Scratch」後,會跳出一個視窗,按照上面的步驟即可建立Scratch帳號。
[caption id="attachment_24923" align="aligncenter" width="860"]
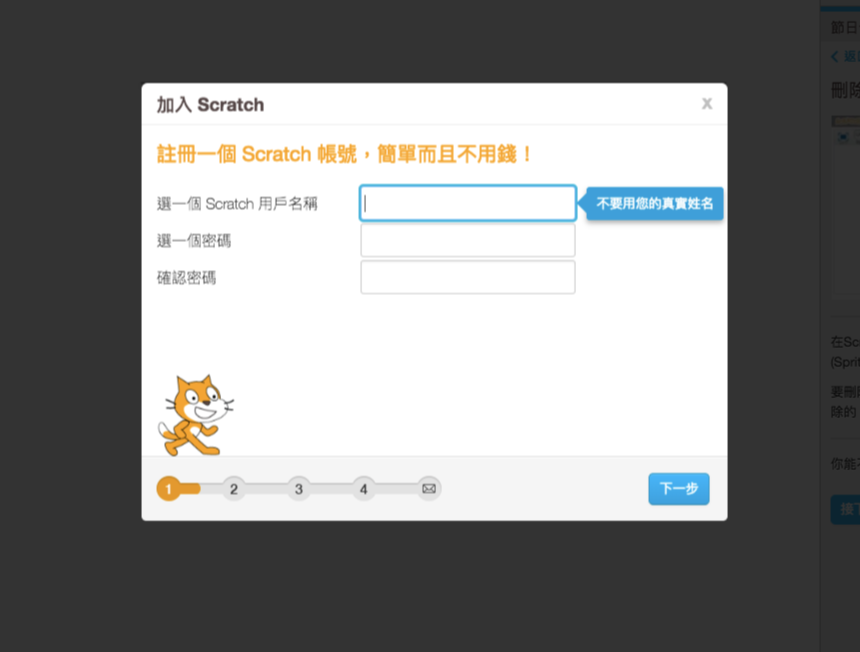
圖2 按照指示一步步操作,即可建立Scratch帳號。[/caption]
Step3:帳號建立後,讓我們開始製作互動式父親節卡片吧!有看到螢幕左上邊有一隻小貓嗎?請將滑鼠移至它的身上,按下滑鼠右鍵,然後選擇「刪除」,小貓就被刪除而消失了。
[caption id="attachment_24924" align="alignnone" width="656"]
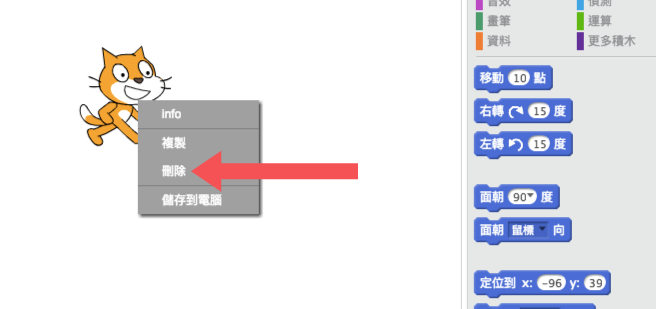
圖3 先把小貓刪除[/caption]
Step4:在Scratch中,人物和物體都叫做「角色(Sprites)」。有4種方式可以在Scratch中增加角色,以下一一介紹:
1.從範例庫挑選角色
[caption id="attachment_24925" align="aligncenter" width="251"]
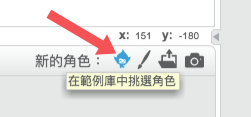
圖4 用滑鼠點選範例庫[/caption]
[caption id="attachment_24926" align="aligncenter" width="1224"]
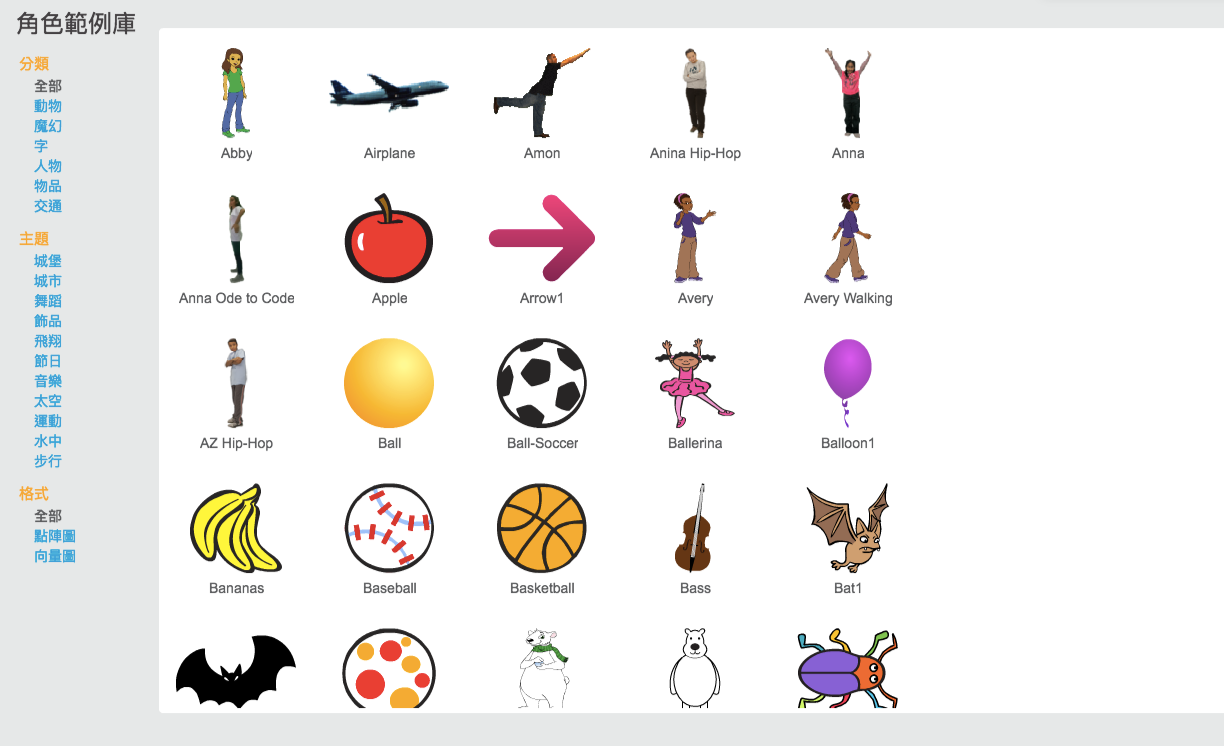
圖5 範例庫內有許多角色可供挑選[/caption]
2.自己繪製新的角色
[caption id="attachment_24927" align="aligncenter" width="301"]
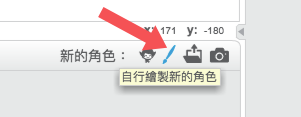
圖6 點選「自行繪製新的角色」[/caption]
[caption id="attachment_24928" align="aligncenter" width="903"]
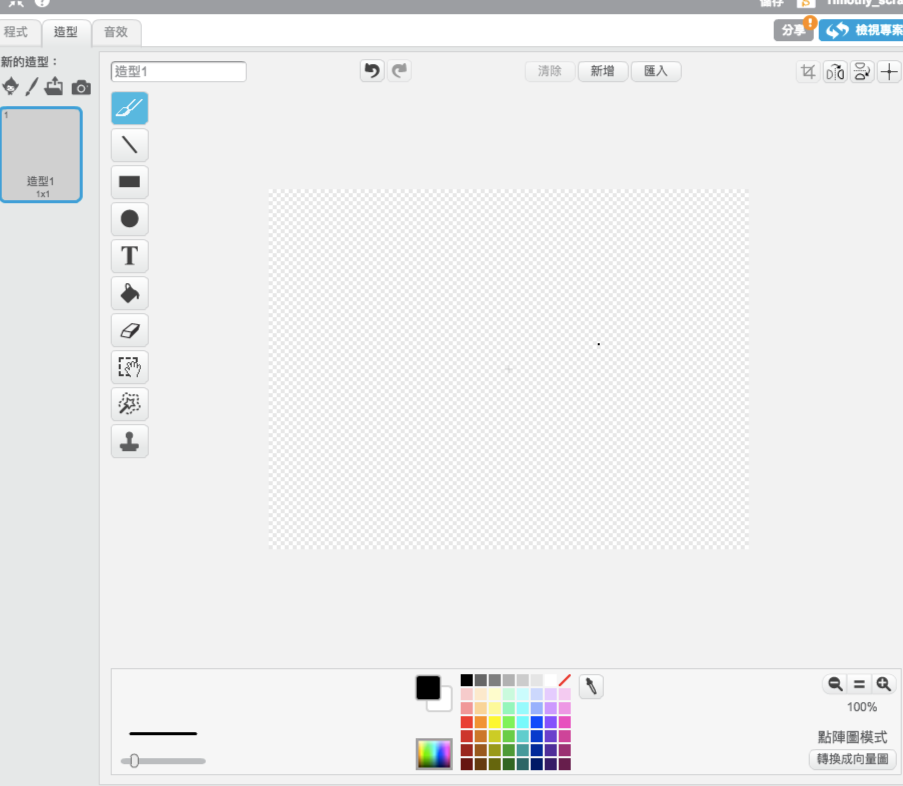
圖7 Scratch介面右方,出現了一個類似「小畫家」的繪圖介面,讀者可在其上繪製自己的角色。[/caption]
3.上傳自己的圖像或角色
[caption id="attachment_24929" align="aligncenter" width="223"]
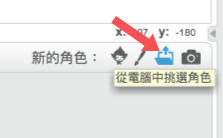
圖8 點選「從電腦中挑選角色」,便可以從電腦中挑選適合的照片作為角色。[/caption]
4.從網路攝影機拍一張照片作為角色
[caption id="attachment_24930" align="aligncenter" width="215"]
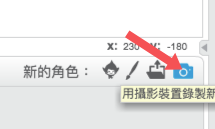
圖9 點選圖標,若您的電腦有安裝網路攝影機,即可開啟並進行拍照。[/caption]
Step5:那我們先從角色範例庫中,選擇一個角色。因為是要送給老爸的互動式卡片,那我們就挑選一個「禮物」的角色。
[caption id="attachment_24931" align="aligncenter" width="1355"]
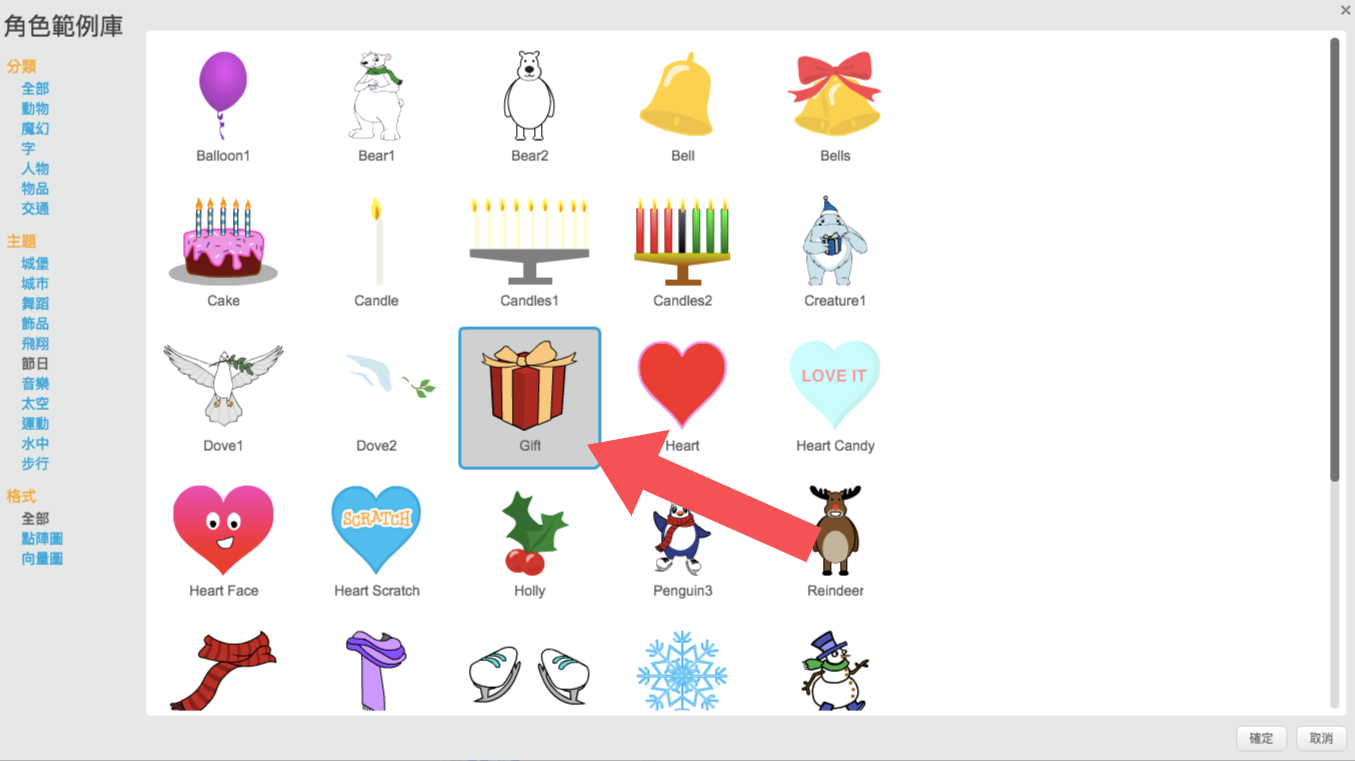
圖10 點選「禮物」角色,並按下「確定」。[/caption]
Step6:那我們現在就讓「禮物」角色產生一些祝福老爸的話,然後加強角色的互動性。
1.在指令積木區塊,讓我們先點選「外觀」。
[caption id="attachment_24932" align="aligncenter" width="569"]
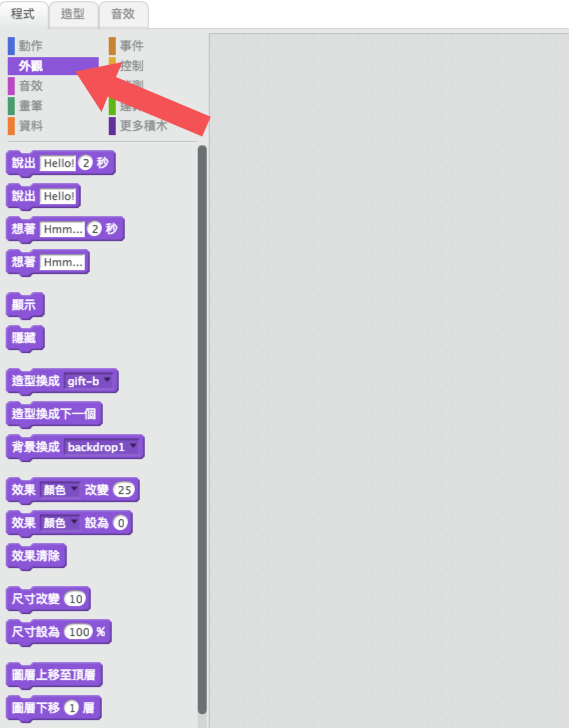
圖11 點選「外觀」,可以看見下面有許多指令積木。[/caption]
2.先拉出一個包含時間的「說出」指令積木,然後把文字改成「爸爸」,時間改成「3」秒。
[caption id="attachment_24933" align="aligncenter" width="617"]
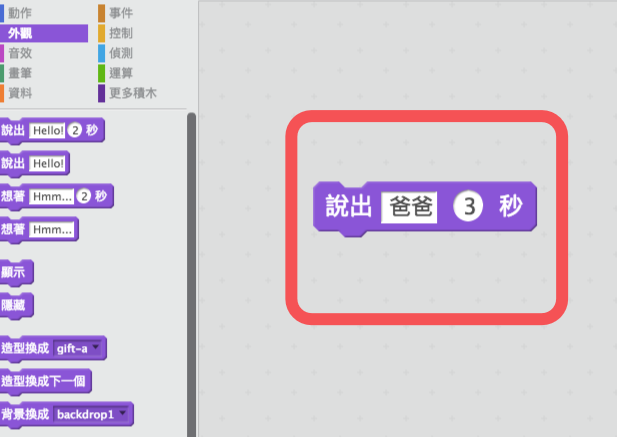
圖12[/caption]
3.再拉出一個不包含時間的「說出」指令積木,並把文字改成「祝您父親節快樂!!」,並與2.的積木組合在一起。
[caption id="attachment_24934" align="aligncenter" width="667"]
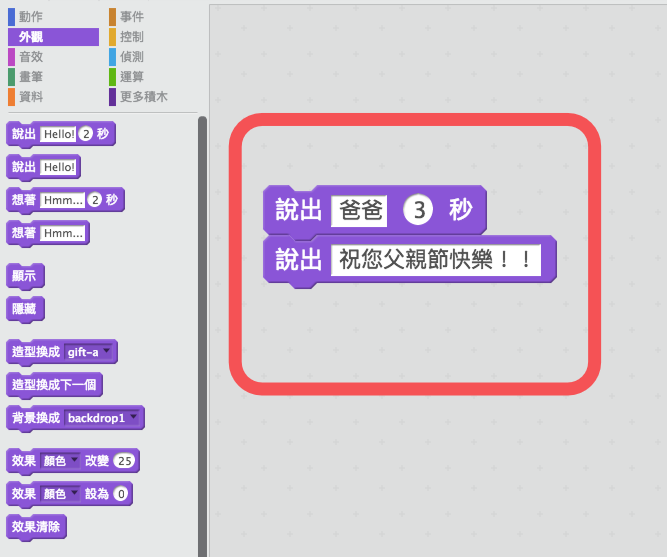
圖13[/caption]
4.現在角色還沒有互動性,所以,讓我們從「事件」程式積木指令區中,取出「當角色被點擊」指令積木,然後與之前兩個步驟的指令積木組合在一起。
[caption id="attachment_24935" align="aligncenter" width="631"]
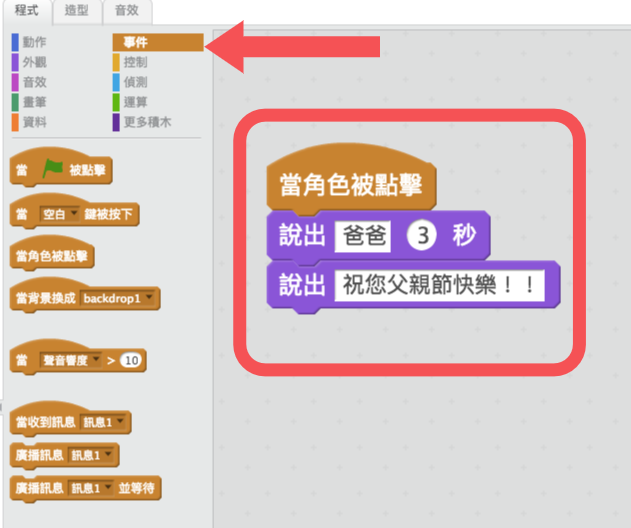
圖14[/caption]
5.現在,用滑鼠點擊一下「禮物」角色,禮物是不是說話了呢?
[caption id="attachment_24936" align="aligncenter" width="500"]
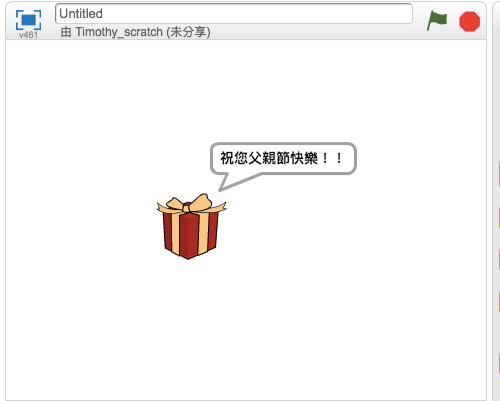
圖15 透過「事件」指令區中的指令積木,我們幫角色增添了互動性。[/caption]
這只是小小嘗試,您也可以發揮自己的創意,幫老爸製作互動式卡片。比方說,您可以把自己的照片作為「角色」,然後運用剛剛的方式,讓角色對爸爸說話⋯⋯等等。接下來,我們要幫互動式卡片增加背景。
Step7:增加「背景」有四種方式,跟前面提到的增加「角色」十分類似,請參考圖16、17。
[caption id="attachment_24937" align="aligncenter" width="700"]
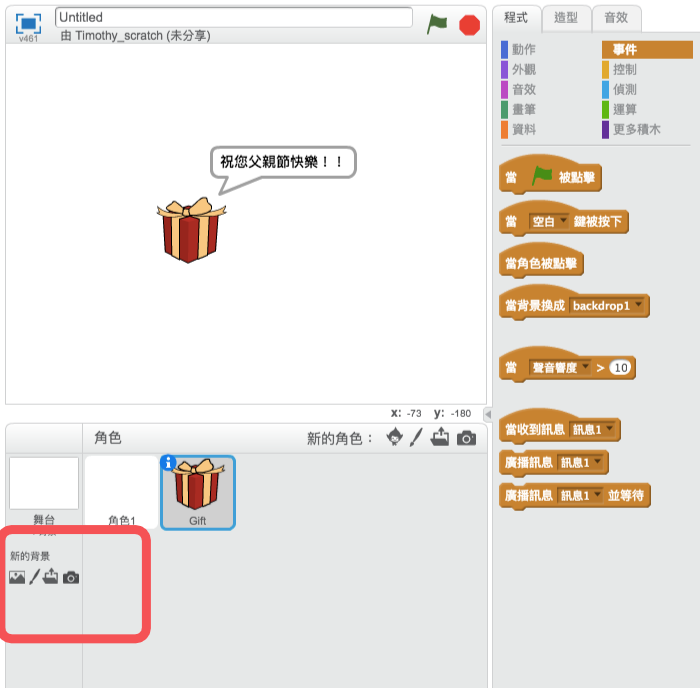
圖16 增加「背景」的功能列位於Scratch介面的左下方[/caption]
[caption id="attachment_24938" align="aligncenter" width="305"]
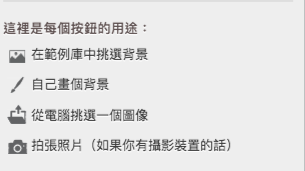
圖17[/caption]
Step8:就讓我們從範例庫中增加一個背景
[caption id="attachment_24939" align="aligncenter" width="1368"]
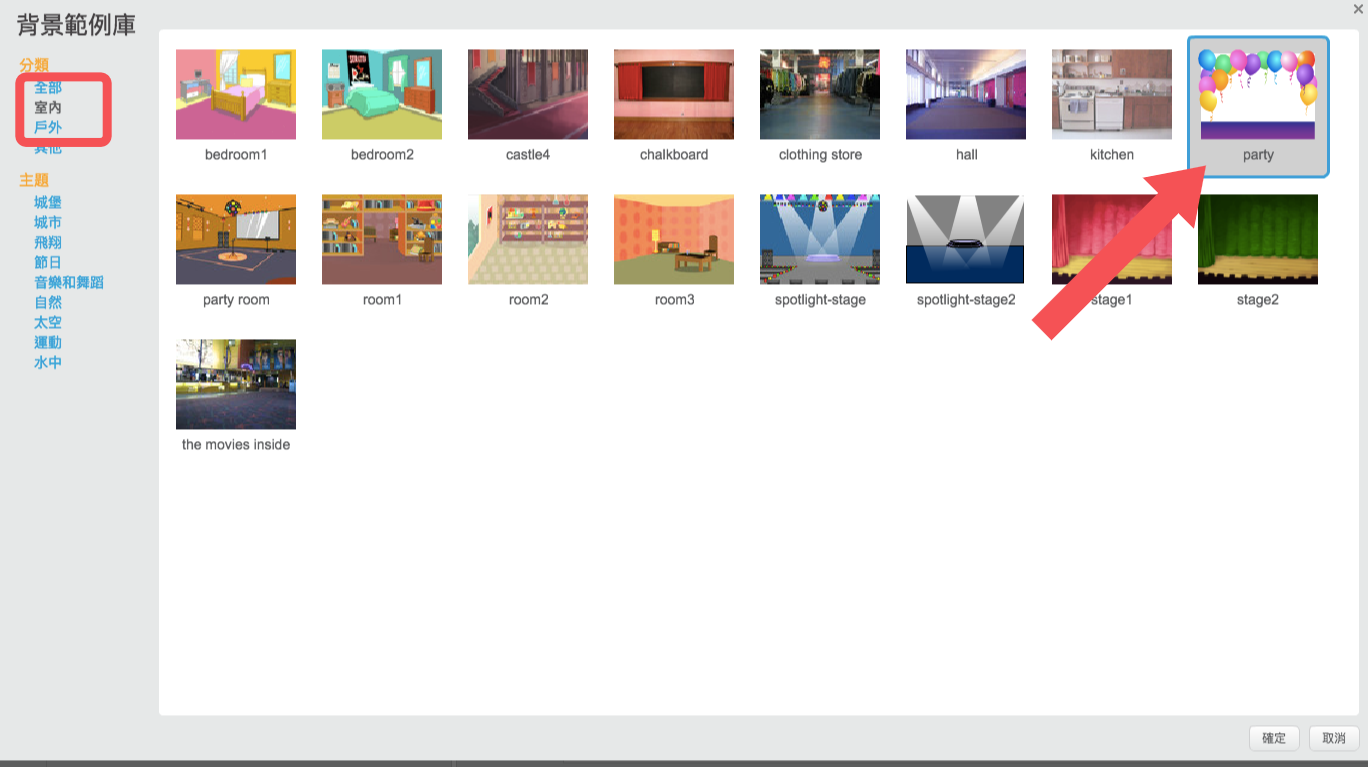
圖18 讓我們增加一個「party」背景[/caption]
[caption id="attachment_24940" align="aligncenter" width="497"]
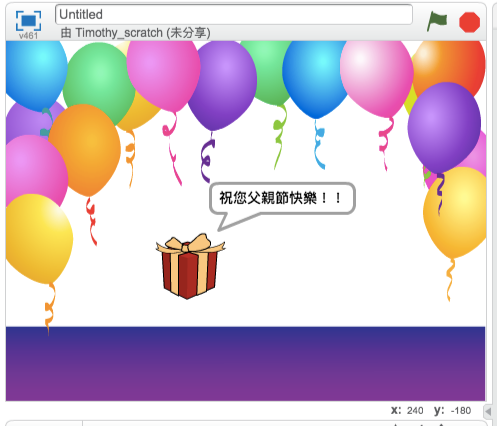
圖19 卡片會如此呈現[/caption]
Step9:現在讓我們互動式卡片增加一點聲音。點選「音效」標籤,可以看見1.音效範例庫;2.錄音;3.從電腦檔案中增加音效。
[caption id="attachment_24941" align="aligncenter" width="381"]
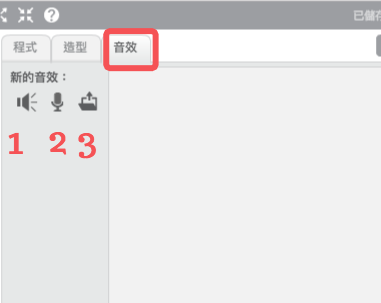
圖20[/caption]
Step10:讓我們從音效範例庫中增加一段音效
[caption id="attachment_24942" align="aligncenter" width="1375"]
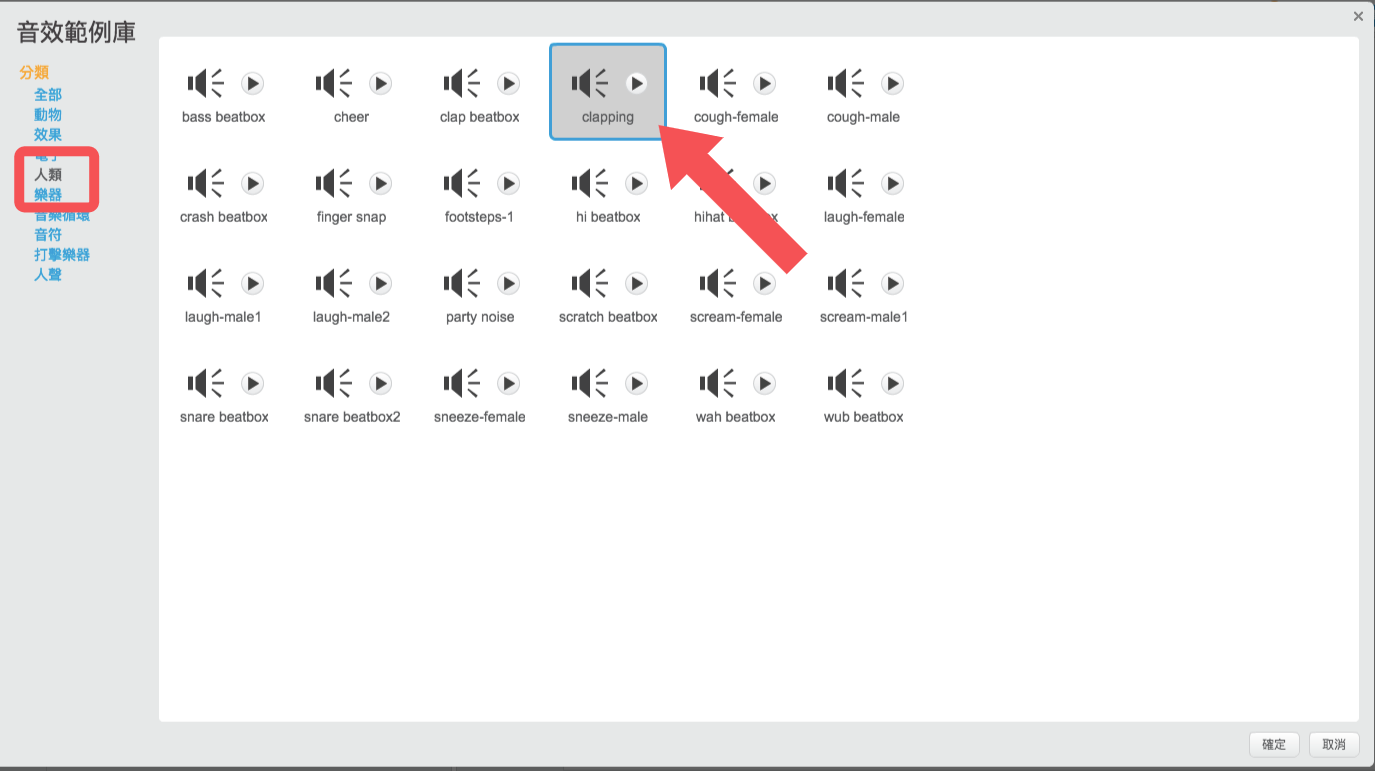
圖21 選擇「人類」類別中的「clapping」音效,並按確定。[/caption]
Step11:如何把音效加入互動式卡片呢?讓我們回到程式區,從「音效」指令積木櫃中,取出「播放音效……到底」指令積木,並組合在前面指令積木的下方。
[caption id="attachment_24943" align="aligncenter" width="758"]
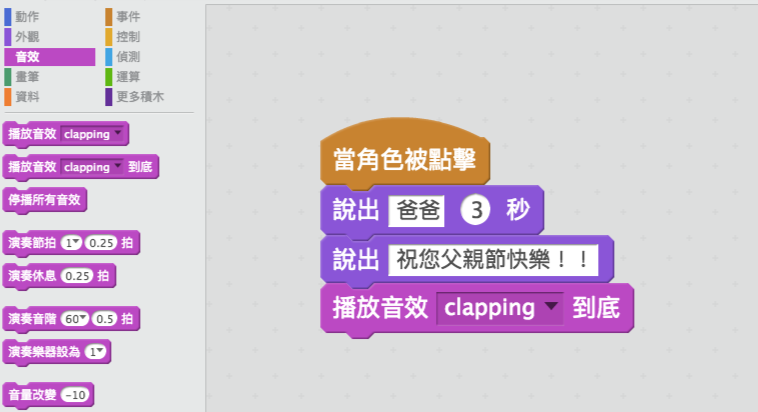
圖22[/caption]
點擊一下「禮物」角色,是不是有拍手的聲音呢?
Step12:也許讀者們會有一個問題:「當我們分享這個互動式卡片給老爸時,他要怎麼樣才會知道如何互動呢?」OK!現在,就讓我們增加一些指示。打開「事件」指令積木區,取出「當 綠色旗子 被點擊」指令積木。然後再從「外觀」指令積木區中,取出不包含時間的「說出」指令積木,並在「說出」指令積木上,寫下「請點擊禮物一下」。
[caption id="attachment_24944" align="aligncenter" width="711"]
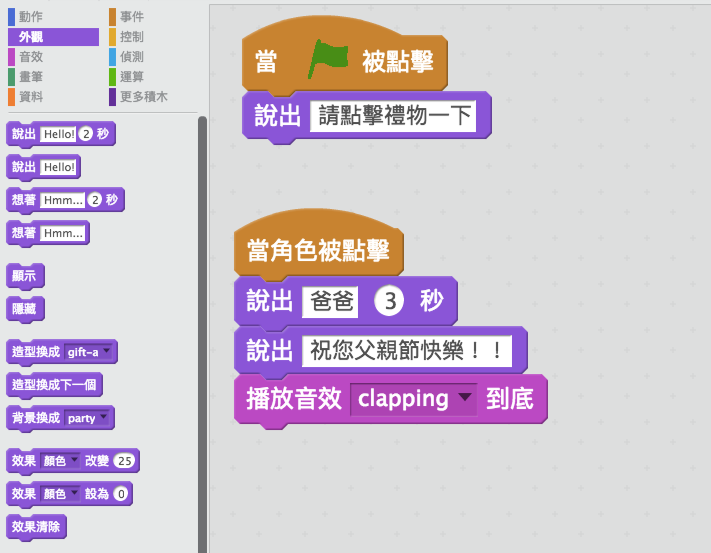
圖23[/caption]
現在點擊一下Scratch介面中上方的「綠色旗子」,是否出現了指示呢?
[caption id="attachment_24945" align="aligncenter" width="493"]
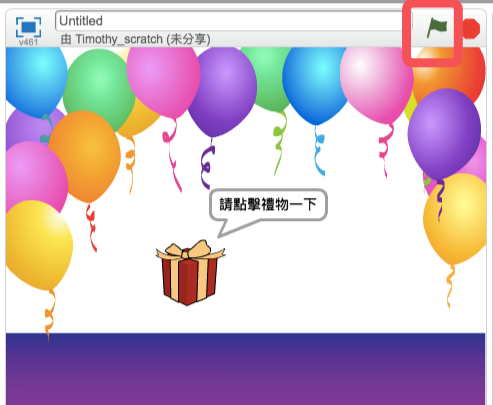
圖24[/caption]
Step13:最後,就是要分享我們的互動式卡片囉!點選Scratch介面右上角的「分享」,然後進入到專案頁面,填寫「專案名稱」、「操作說明」及「備註與謝誌」。最後,點選右上角的「分享」,就大功告成了。
[caption id="attachment_24946" align="aligncenter" width="515"]
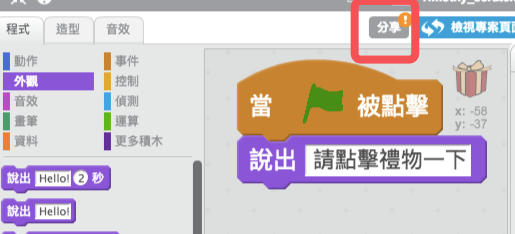
圖25[/caption]
[caption id="attachment_24947" align="aligncenter" width="943"]
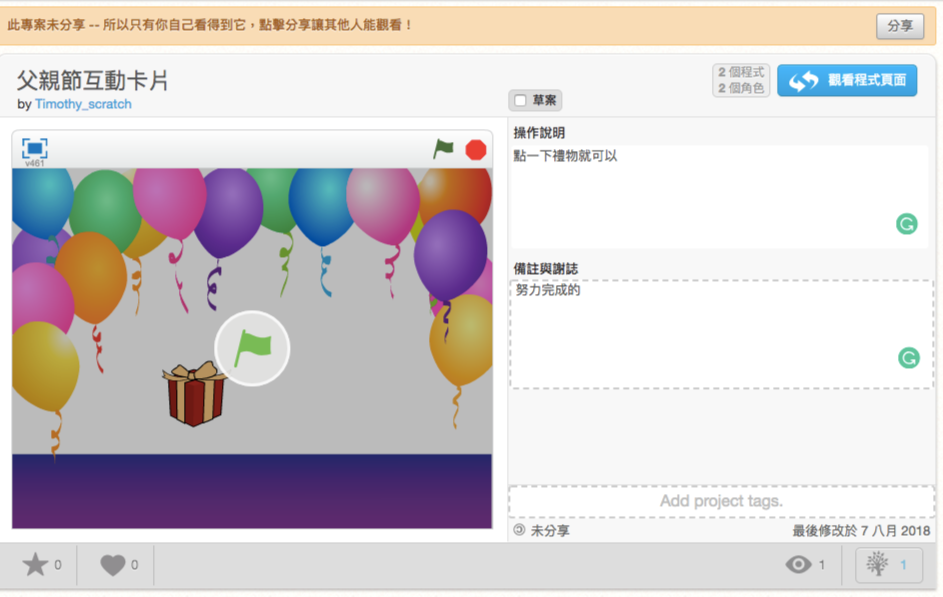
圖26[/caption]
[caption id="attachment_24948" align="aligncenter" width="943"]
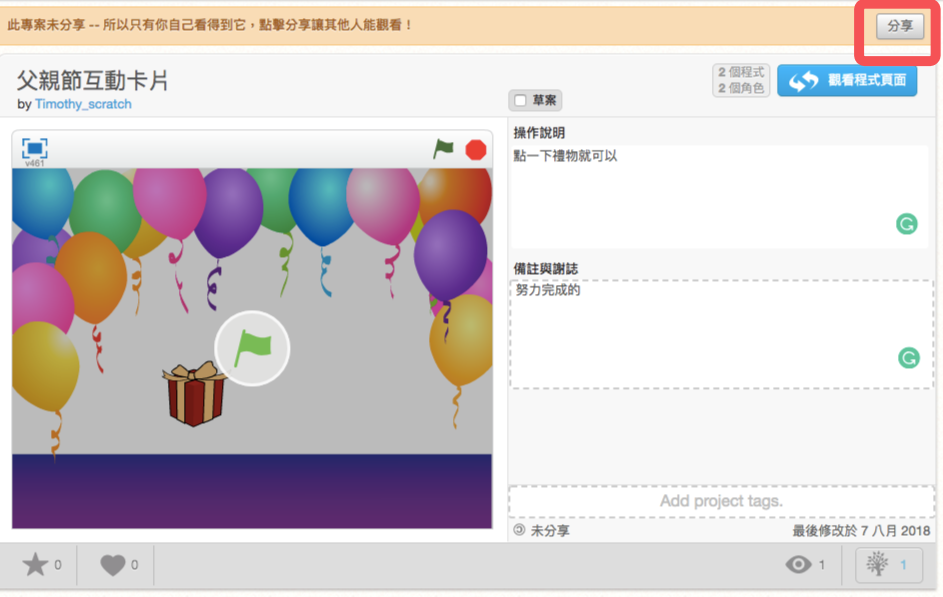
圖27[/caption]
現在,把專案網頁上的網址寄給老爸就可以了。趕快動手製作最酷、最炫的互動式卡片給老爸吧!
[caption id="attachment_24949" align="aligncenter" width="823"]
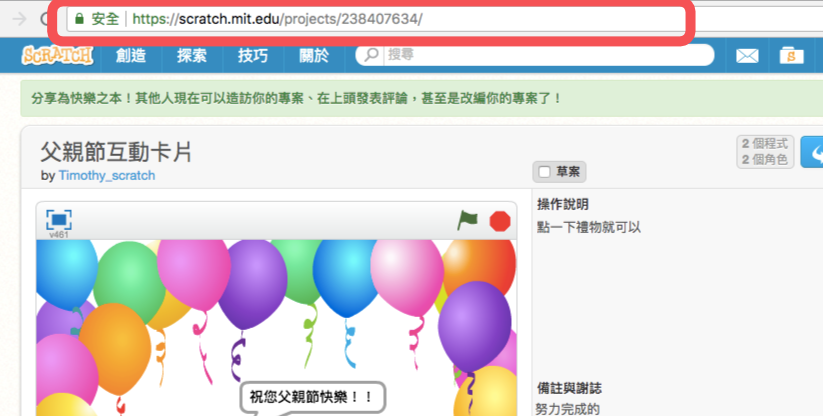
圖28[/caption]
備註:這篇文章是以Scratch 2.0編寫而成,但目前MIT Scratch團隊已發佈Scratch 3.0的Beta版,所以讀者們也可以運用3.0版製作互動式卡片,而互動式卡片的指令積木如下圖:
[caption id="attachment_24950" align="aligncenter" width="1020"]
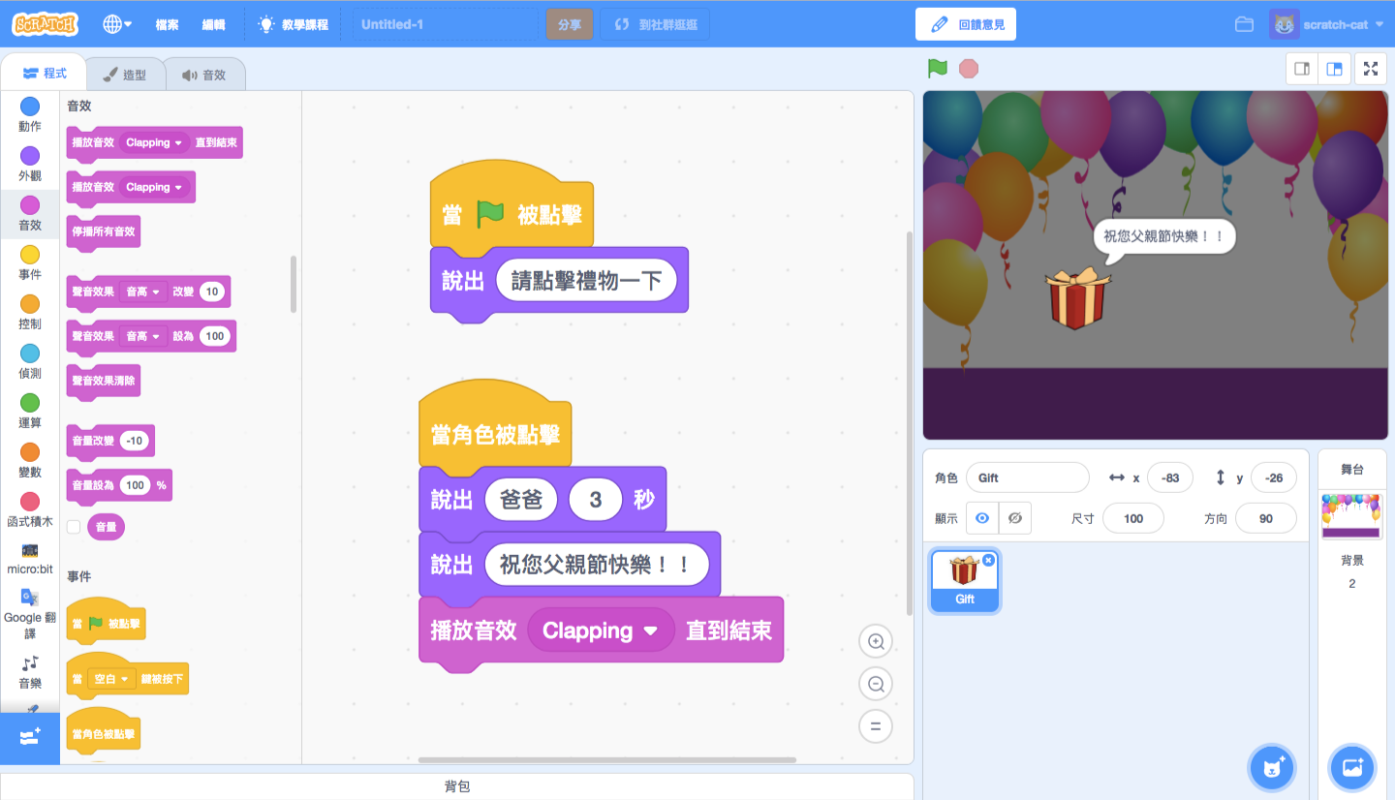
圖29 Scratch 3.0的操作方式與2.0並沒有很大差異,但選擇角色、背景及音效的位置不太一樣。[/caption]
相關文章
留言 💬 (0)
還沒有留言,來當第一個。