【專案研發】環保的錦囊妙計:如何用LinkIt 7697搭配聯發科技MCS,製作出魚菜共生裝置
現今,由於環保意識抬頭,社會各界紛紛意識到對環境友好的農耕方法,以及永續經營的重要性。所以,魚菜共生的高用水性,以及養魚、蝦所產生廢棄物的再生利用,是非常好永續利用環境、資源的一種耕種方式。這一篇文章,就是用手把手的方式,教大家如何自己做一個魚菜共生的裝置,一起來看看!
| 作者/攝影 |
CAVEDU教育團隊 薛皓云 |
| 時間 | 2小時 |
| 成本 | 3700+元 |
| 難度 |
★★☆☆☆ |
| 材料表 |
|
硬體組裝:
1.將沉水馬達線透過杜邦線延長(紅正白負)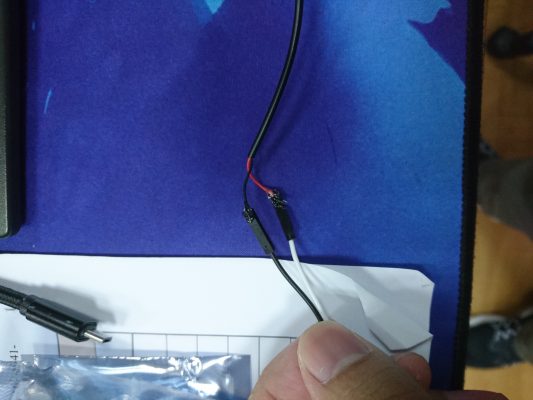 2.將沉水馬達利用熱融膠,黏至SAMLA收納盒 22公升底部角落。
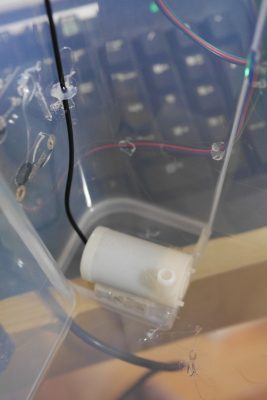
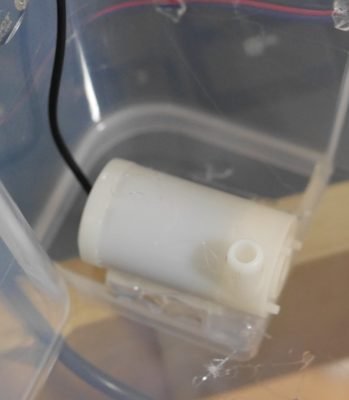 3.將沉水馬達的線,利用熱融膠沿著箱子角落固定住。
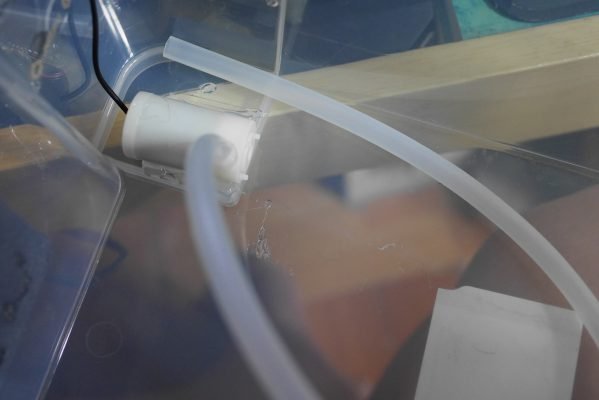
 4.接上塑膠軟管至沉水馬達上,並放著。
 5.將RK IoT EXShield擴充板,利用熱融膠黏至SAMLA收納盒22公升側面(寬的那一面)。
[gallery columns="2" size="medium" ids="25164,25165"]
6.在RK IoT EXShield擴充板上方,黏上繼電器。
5.將RK IoT EXShield擴充板,利用熱融膠黏至SAMLA收納盒22公升側面(寬的那一面)。
[gallery columns="2" size="medium" ids="25164,25165"]
6.在RK IoT EXShield擴充板上方,黏上繼電器。
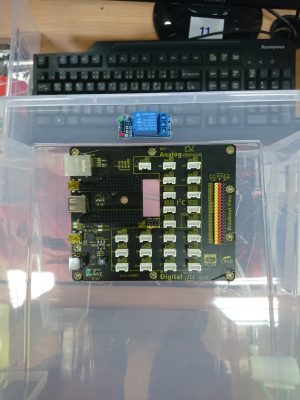 7.將沉水馬達的白色電線接至繼電器上NO腳位
8.從繼電器COM腳位接一條跳線,至RK IoT EXShield的GND上。
7.將沉水馬達的白色電線接至繼電器上NO腳位
8.從繼電器COM腳位接一條跳線,至RK IoT EXShield的GND上。
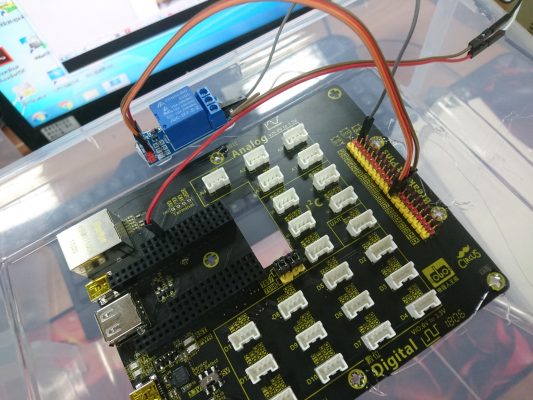
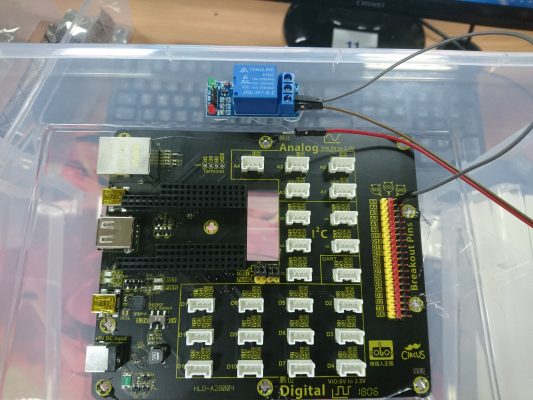 9.繼電器上VCC、GND、IN,分別接上RK IoT EXShield的5V、GND、D8。
10.沉水馬達的正極,接於杜邦母頭左上角數來第4腳位。
9.繼電器上VCC、GND、IN,分別接上RK IoT EXShield的5V、GND、D8。
10.沉水馬達的正極,接於杜邦母頭左上角數來第4腳位。
 11.將Waterproof感測器的水下感測器的黃、紅、黑線,分別接上Waterproof感測器轉接器的A、B、C。
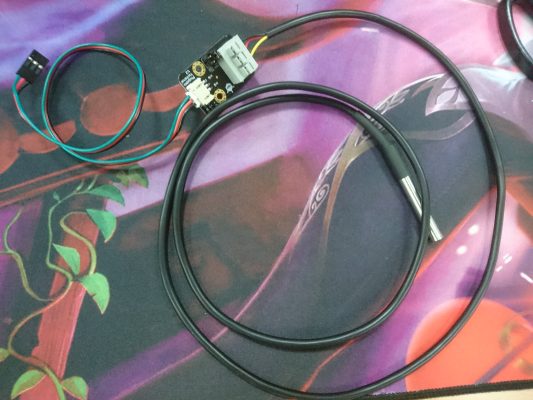 12.將Waterproof感測器轉接器黏至外箱右上角上
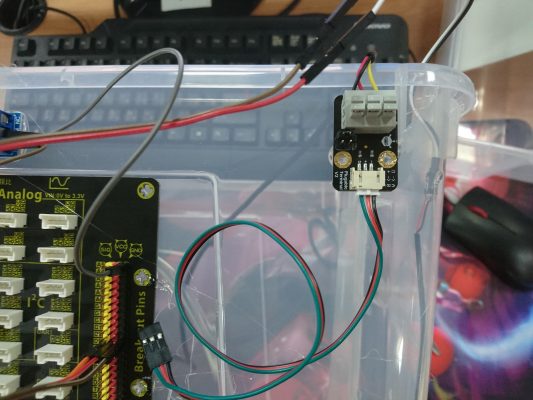 13.將Waterproof感測器轉接器,接至RK IoT EXShield擴充版的D2。
14.將Waterproof感測器,放至SAMLA收納盒 22公升中。
13.將Waterproof感測器轉接器,接至RK IoT EXShield擴充版的D2。
14.將Waterproof感測器,放至SAMLA收納盒 22公升中。
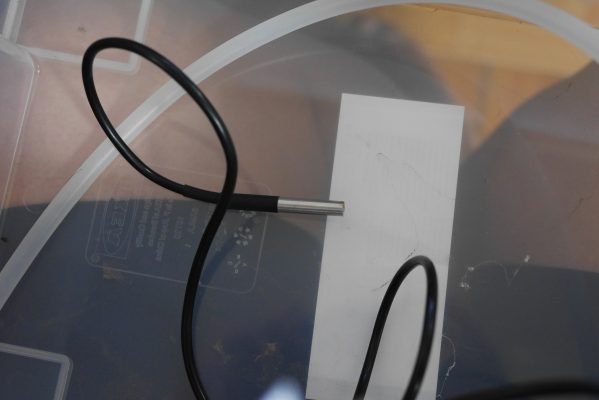 15.裁切pH計的泡棉收納盒
[gallery columns="2" size="medium" ids="25172,25173"]
16.將裁切完的泡棉,黏至SAMLA收納盒 22公升側面中間(窄的那一面)。
[caption id="attachment_25174" align="aligncenter" width="533"]
15.裁切pH計的泡棉收納盒
[gallery columns="2" size="medium" ids="25172,25173"]
16.將裁切完的泡棉,黏至SAMLA收納盒 22公升側面中間(窄的那一面)。
[caption id="attachment_25174" align="aligncenter" width="533"]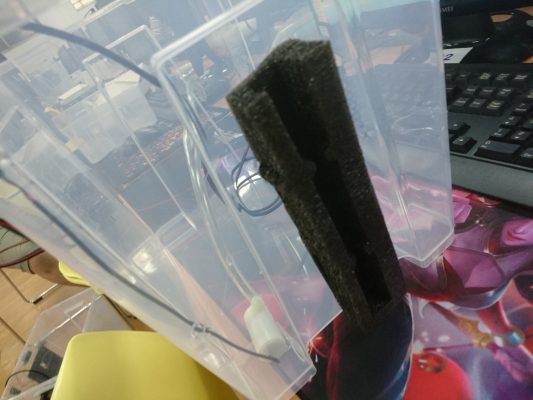 圖15[/caption]
17.在SAMLA收納盒 22公升側面(窄的那一面),左下角黏上pH計轉接器。
18.接上pH計並放入泡棉收納盒中
[caption id="attachment_25175" align="aligncenter" width="267"]
圖15[/caption]
17.在SAMLA收納盒 22公升側面(窄的那一面),左下角黏上pH計轉接器。
18.接上pH計並放入泡棉收納盒中
[caption id="attachment_25175" align="aligncenter" width="267"]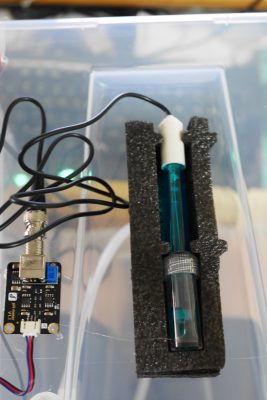 圖16[/caption]
19.將pH計轉接器,接至RK IoT EXShield擴充版的A1。
20.土壤感測器S、+、-,分別接至RK IoT EXShield擴充版的A0、5V、GND。
[caption id="attachment_25176" align="aligncenter" width="533"]
圖16[/caption]
19.將pH計轉接器,接至RK IoT EXShield擴充版的A1。
20.土壤感測器S、+、-,分別接至RK IoT EXShield擴充版的A0、5V、GND。
[caption id="attachment_25176" align="aligncenter" width="533"]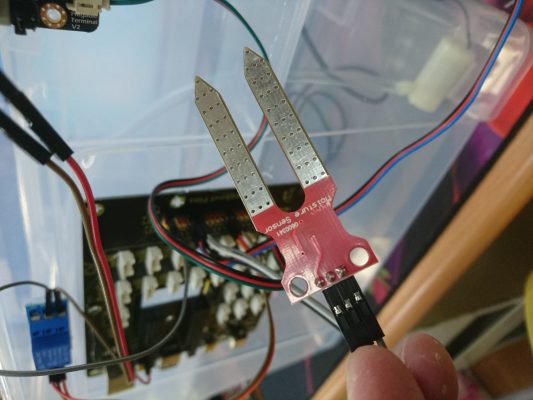 圖17[/caption]
21.將發泡煉石,裝至SAMLA 11/22公升收納盒,專用分隔板中約5cm高。
[caption id="attachment_25177" align="aligncenter" width="599"]
圖17[/caption]
21.將發泡煉石,裝至SAMLA 11/22公升收納盒,專用分隔板中約5cm高。
[caption id="attachment_25177" align="aligncenter" width="599"]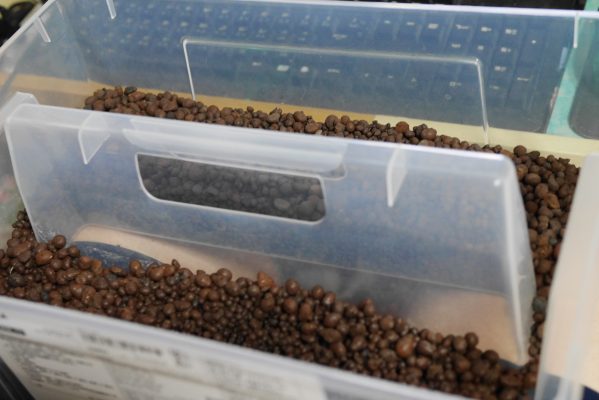 圖18[/caption]
22.將SAMLA 11/22公升收納盒專用分隔板,放至SAMLA 收納盒 22公升上,並將塑膠軟管從SAMLA 11/22公升收納盒專用分隔板中間穿出。
[caption id="attachment_25178" align="aligncenter" width="599"]
圖18[/caption]
22.將SAMLA 11/22公升收納盒專用分隔板,放至SAMLA 收納盒 22公升上,並將塑膠軟管從SAMLA 11/22公升收納盒專用分隔板中間穿出。
[caption id="attachment_25178" align="aligncenter" width="599"]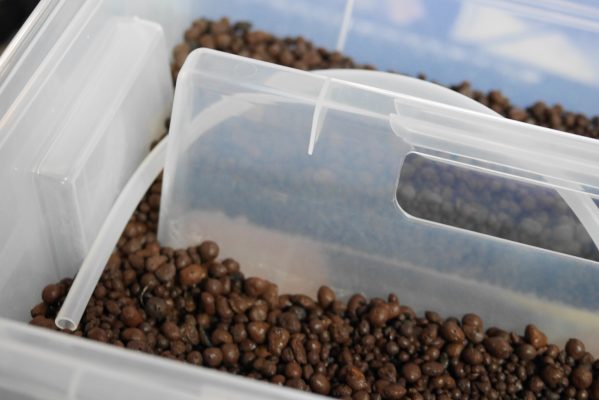 圖19[/caption]
23.將土壤感測器置入發泡煉石中
[caption id="attachment_25179" align="aligncenter" width="599"]
圖19[/caption]
23.將土壤感測器置入發泡煉石中
[caption id="attachment_25179" align="aligncenter" width="599"]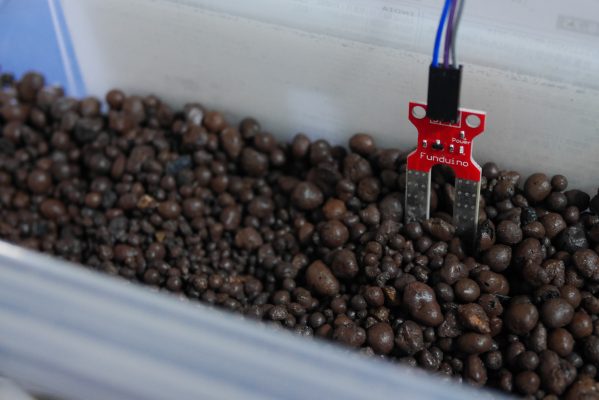 圖20[/caption]
24.將DHT11黏至RK IoT EXShield擴充板右下角
[caption id="attachment_25180" align="aligncenter" width="533"]
圖20[/caption]
24.將DHT11黏至RK IoT EXShield擴充板右下角
[caption id="attachment_25180" align="aligncenter" width="533"]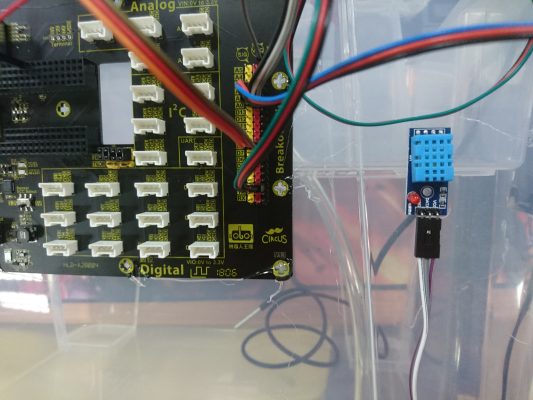 圖21[/caption]
25.將DHT11的VCC、DATA、GND,分別接到RK IoT EXShield擴充版的VCC、A2(P16)、GND。
圖21[/caption]
25.將DHT11的VCC、DATA、GND,分別接到RK IoT EXShield擴充版的VCC、A2(P16)、GND。
這樣硬體部分就大功告成囉!!
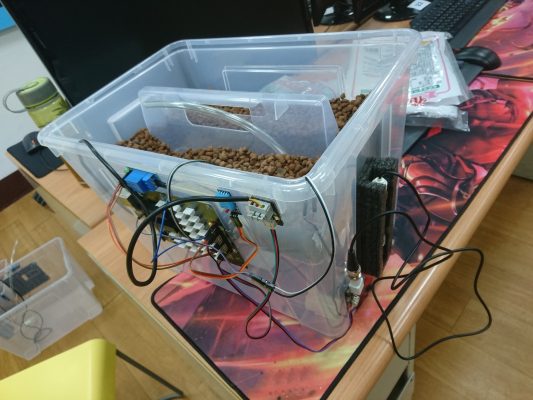
接下來是程式部分:
1.申請MCS(MediaTek Cloud Sandbox,簡稱MCS,由聯發科技所推出的雲端服務)帳號。 2.新增產品原型名稱設定如圖23 [caption id="attachment_25182" align="aligncenter" width="620"]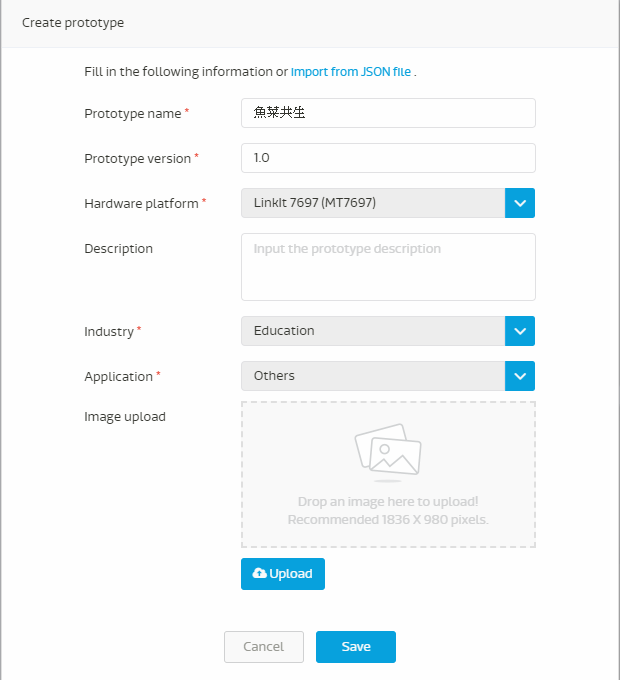 圖23[/caption]
3.新增完畢後點選詳情
[caption id="attachment_25183" align="aligncenter" width="633"]
圖23[/caption]
3.新增完畢後點選詳情
[caption id="attachment_25183" align="aligncenter" width="633"]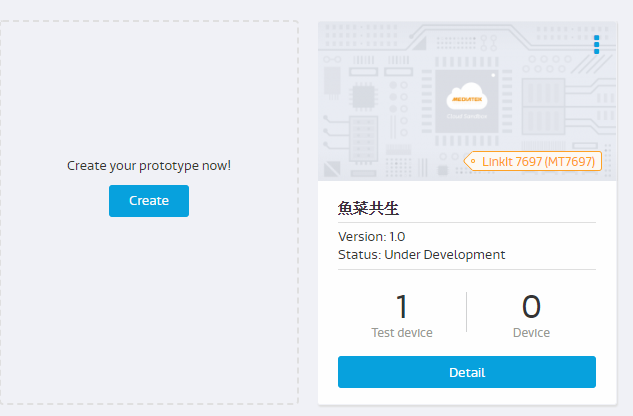 圖24[/caption]
4.新增顯示通道酸鹼值——ID:ph;資料型態:浮點數;單位:N/A。
[caption id="attachment_25184" align="aligncenter" width="620"]
圖24[/caption]
4.新增顯示通道酸鹼值——ID:ph;資料型態:浮點數;單位:N/A。
[caption id="attachment_25184" align="aligncenter" width="620"]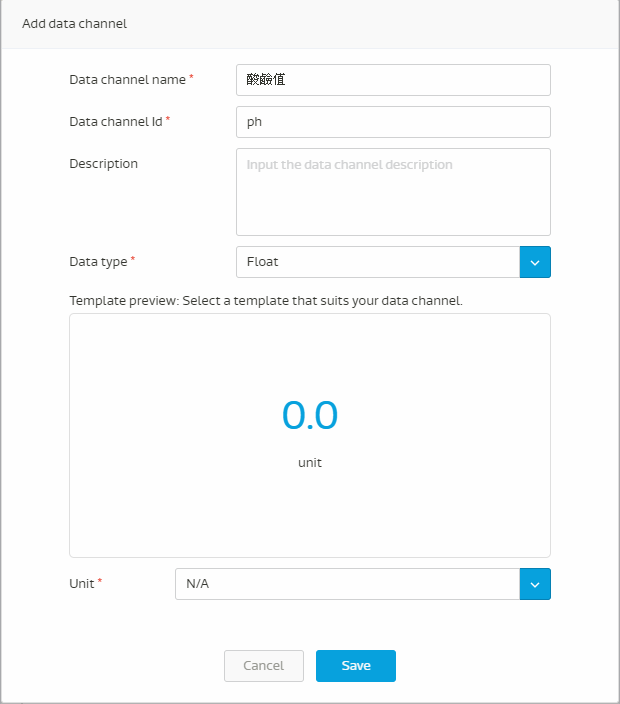 圖25[/caption]
5.新增顯示通道水下溫度——ID:temp_wa;資料型態:浮點數;單位:攝氏。
[caption id="attachment_25185" align="aligncenter" width="622"]
圖25[/caption]
5.新增顯示通道水下溫度——ID:temp_wa;資料型態:浮點數;單位:攝氏。
[caption id="attachment_25185" align="aligncenter" width="622"]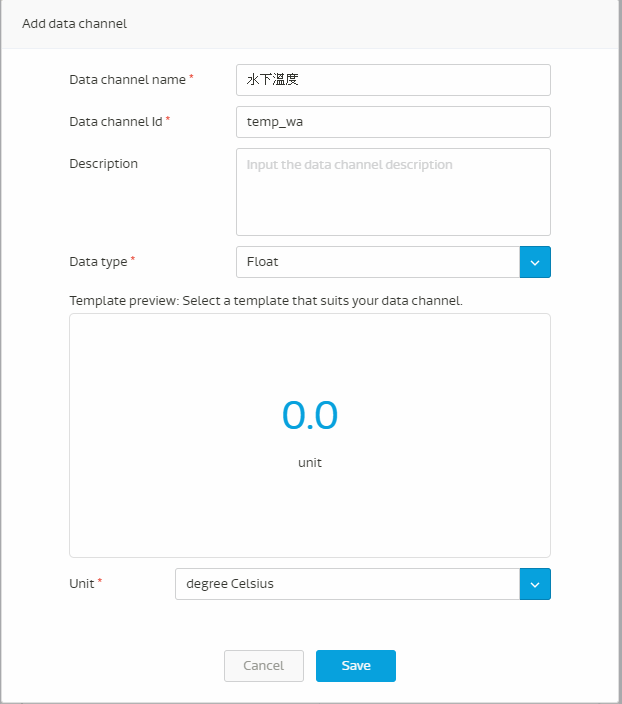 圖26[/caption]
6.新增顯示通道土壤溼度——ID:Mo;資料型態:分類Key1名稱:乾;Key1值:D;Key2名稱:濕;Key2值:W。
[caption id="attachment_25186" align="aligncenter" width="620"]
圖26[/caption]
6.新增顯示通道土壤溼度——ID:Mo;資料型態:分類Key1名稱:乾;Key1值:D;Key2名稱:濕;Key2值:W。
[caption id="attachment_25186" align="aligncenter" width="620"]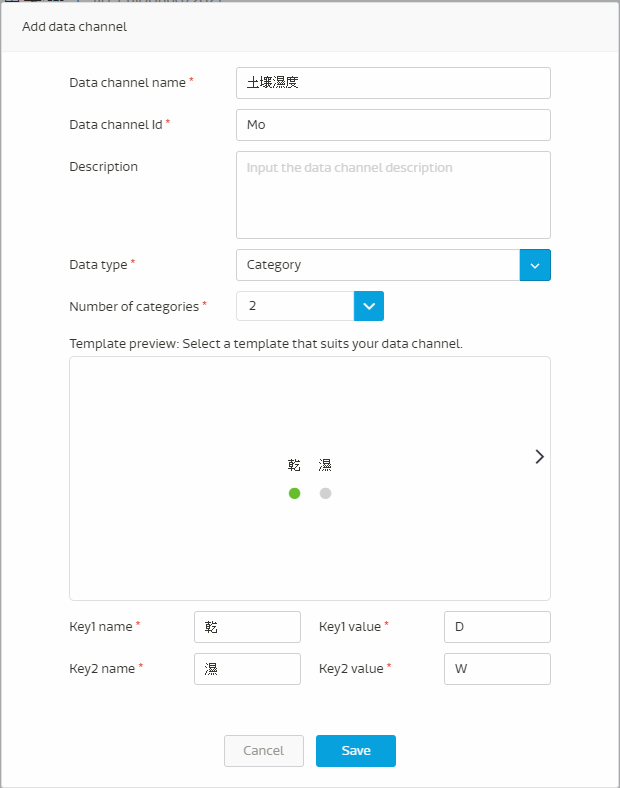 圖27[/caption]
7.新增顯示通道室內溫度——ID:T;資料型態:整數;單位:攝氏。
[caption id="attachment_25187" align="aligncenter" width="551"]
圖27[/caption]
7.新增顯示通道室內溫度——ID:T;資料型態:整數;單位:攝氏。
[caption id="attachment_25187" align="aligncenter" width="551"]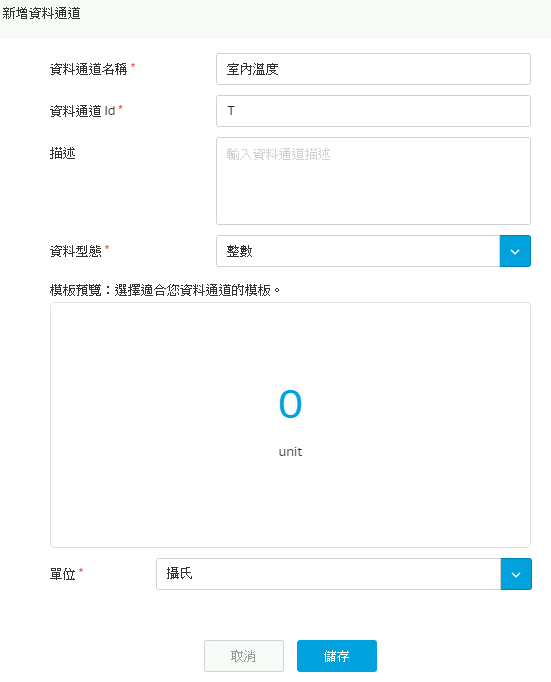 圖28[/caption]
8.新增顯示通道室內溼度——ID:H;資料型態:整數;單位:百分比。
[caption id="attachment_25188" align="aligncenter" width="608"]
圖28[/caption]
8.新增顯示通道室內溼度——ID:H;資料型態:整數;單位:百分比。
[caption id="attachment_25188" align="aligncenter" width="608"]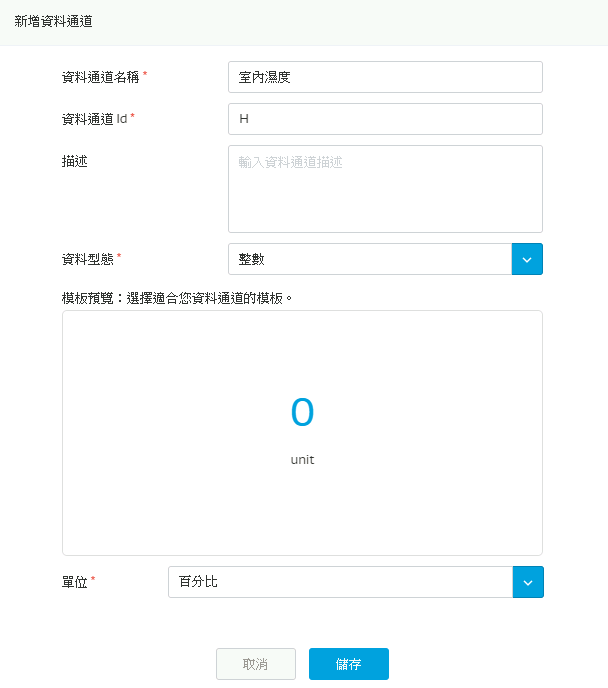 圖29[/caption]
9.新增測試裝置
[caption id="attachment_25190" align="aligncenter" width="620"]
圖29[/caption]
9.新增測試裝置
[caption id="attachment_25190" align="aligncenter" width="620"]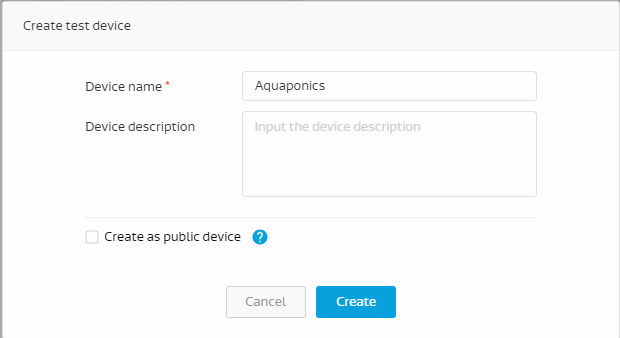 圖30[/caption]
10.完成後前往詳情
[caption id="attachment_25191" align="aligncenter" width="469"]
圖30[/caption]
10.完成後前往詳情
[caption id="attachment_25191" align="aligncenter" width="469"]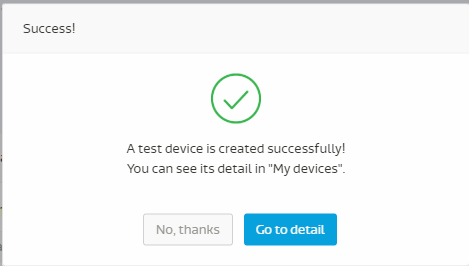 圖31[/caption]
11.記下自己的 DeviceID 及 DeviceKey
[caption id="attachment_25192" align="aligncenter" width="1283"]
圖31[/caption]
11.記下自己的 DeviceID 及 DeviceKey
[caption id="attachment_25192" align="aligncenter" width="1283"]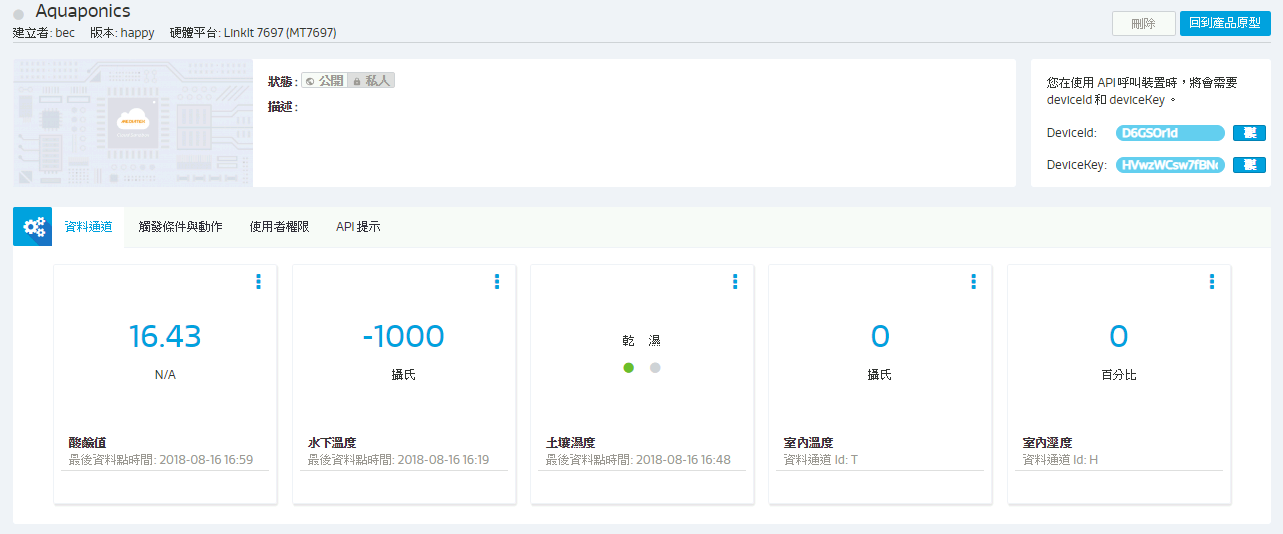 圖32[/caption]
12.開啟程式ino
13.將第7、8行的WiFi帳號密碼,更改成為自己的WiFi帳號密碼。
[caption id="attachment_25193" align="aligncenter" width="455"]
圖32[/caption]
12.開啟程式ino
13.將第7、8行的WiFi帳號密碼,更改成為自己的WiFi帳號密碼。
[caption id="attachment_25193" align="aligncenter" width="455"] 圖33[/caption]
14.第10行中的MCS DeviceID及DeviceKey改成自己的ID及Key
[caption id="attachment_25194" align="aligncenter" width="653"]
圖33[/caption]
14.第10行中的MCS DeviceID及DeviceKey改成自己的ID及Key
[caption id="attachment_25194" align="aligncenter" width="653"] 圖34[/caption]
15.將程式燒入至LinkIt 7697中,並將7697裝至RK IoT EXShield擴充板上。
16.接上5V1A電源等待7697連上網
圖34[/caption]
15.將程式燒入至LinkIt 7697中,並將7697裝至RK IoT EXShield擴充板上。
16.接上5V1A電源等待7697連上網
留言 💬 (0)
還沒有留言,來當第一個。