本篇為[Raspberry Pi] 如何使用遠端桌面 的延續文章,使用RealVNC與各位讀者分享,如何不需在同一網段內也可進行遠端連線。
| 作者/攝影 |
CAVEDU教育團隊 許鈺莨
|
| 文章分類 |
教學技術文 |
| 時間 |
一小時內 |
| 成本 |
最低1500起 |
| 難度 |
*
|
| 材料表 |
- 電腦或其他行動裝置
- Raspberry Pi(購買傳送門-連結)
|
1.在Raspberry Pi上安裝VNC
一開始必須在Raspberry Pi安裝VNC Connect,建議外接螢幕、鍵盤、滑鼠,或用類似像Putty、MobaXterm的軟體SSH登入Raspberry Pi,相關教學請看
[Raspberry Pi] 完全不接螢幕鍵盤滑鼠,電腦一開始就用網路線遠端連線Pi
打開終端機之後,請鍵入:
[pastacode lang="python" manual="%EF%81%AC%09sudo%20apt-get%20update%0A%EF%81%AC%09sudo%20apt-get%20install%20realvnc-vnc-server%0A" message="" highlight="" provider="manual"/]
[caption id="attachment_25203" align="aligncenter" width="1020"]
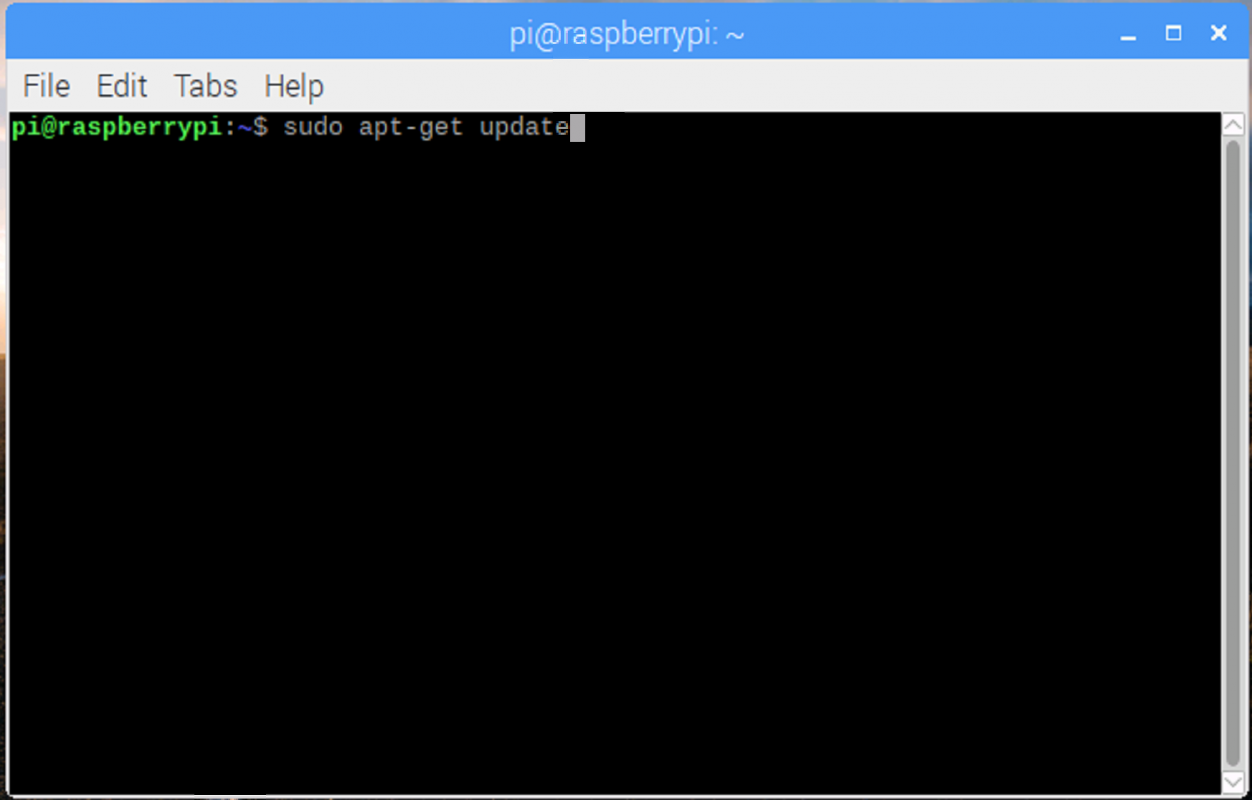
圖1[/caption]
[caption id="attachment_25204" align="aligncenter" width="1020"]
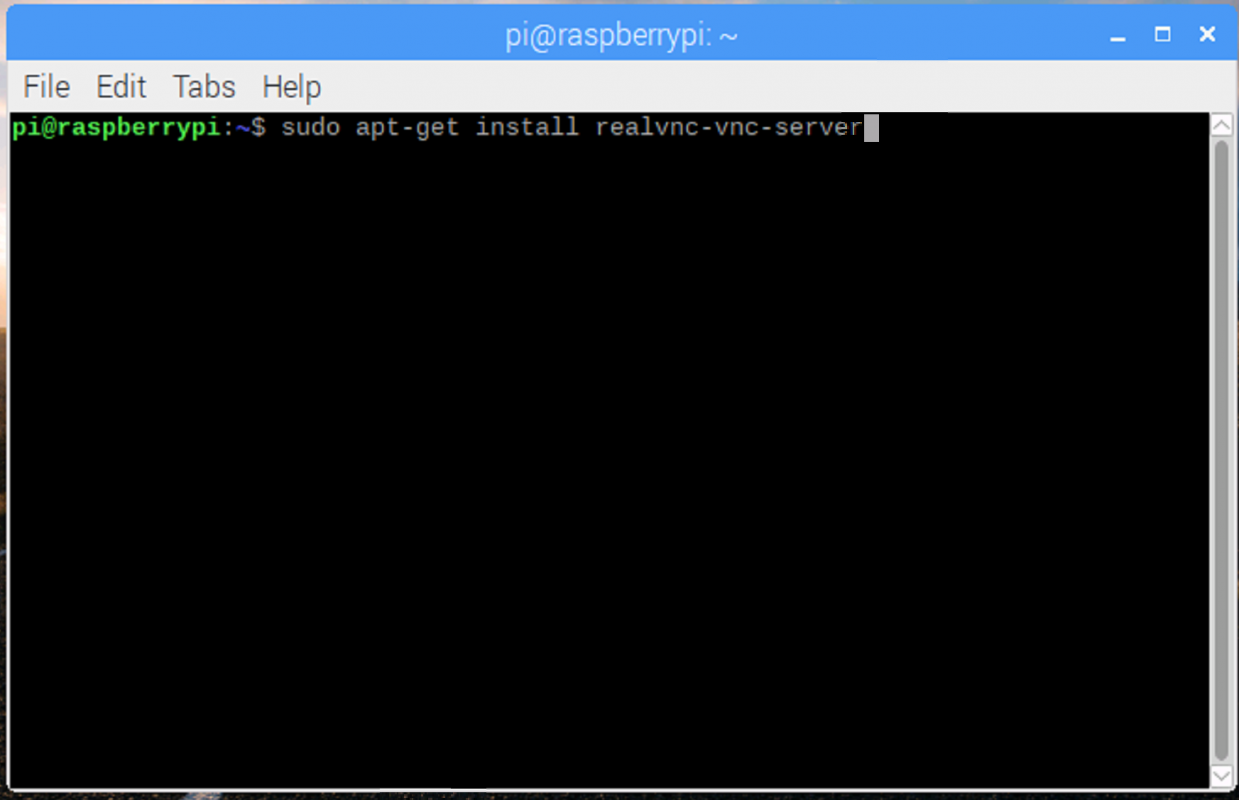
圖2[/caption]
[caption id="attachment_25205" align="aligncenter" width="1020"]
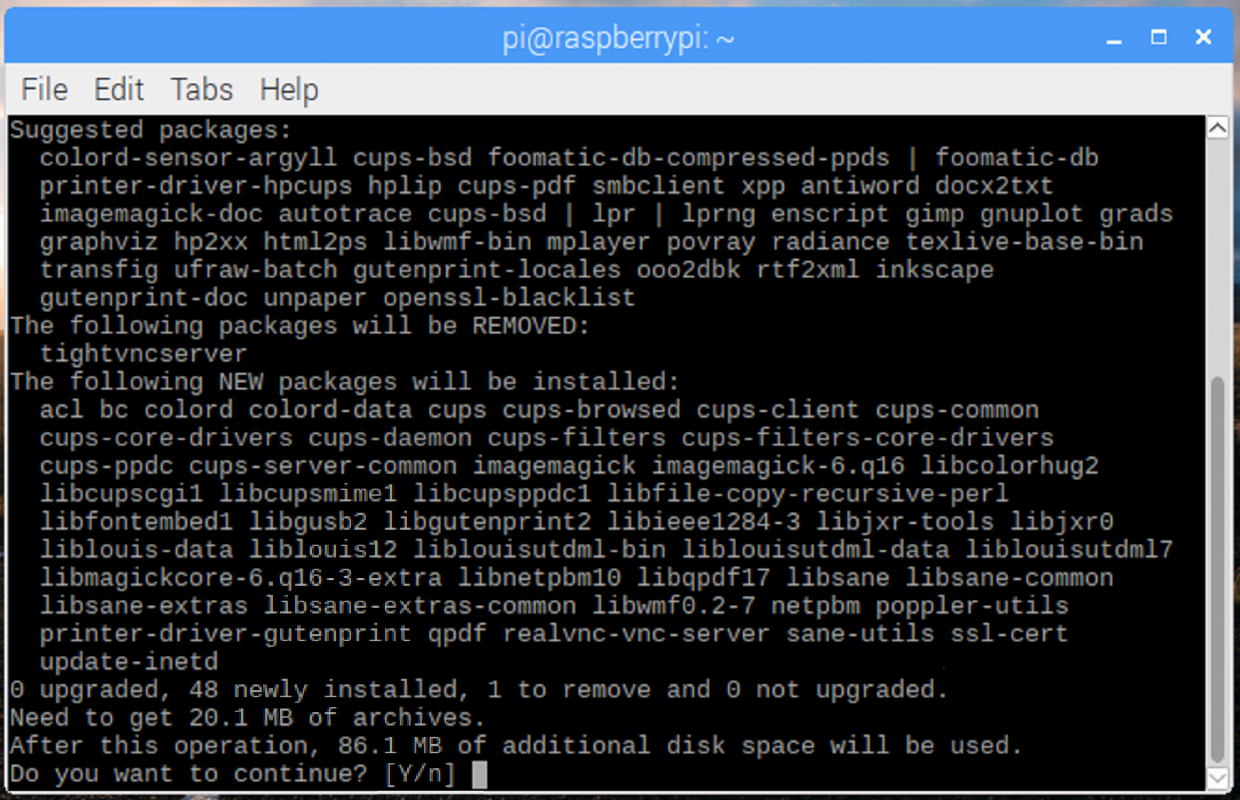
圖3 按Y同意安裝,即可安裝完成。[/caption]
如何開機自動執行RealVNC
a.有接螢幕、鍵盤、滑鼠
[caption id="attachment_25206" align="aligncenter" width="1481"]
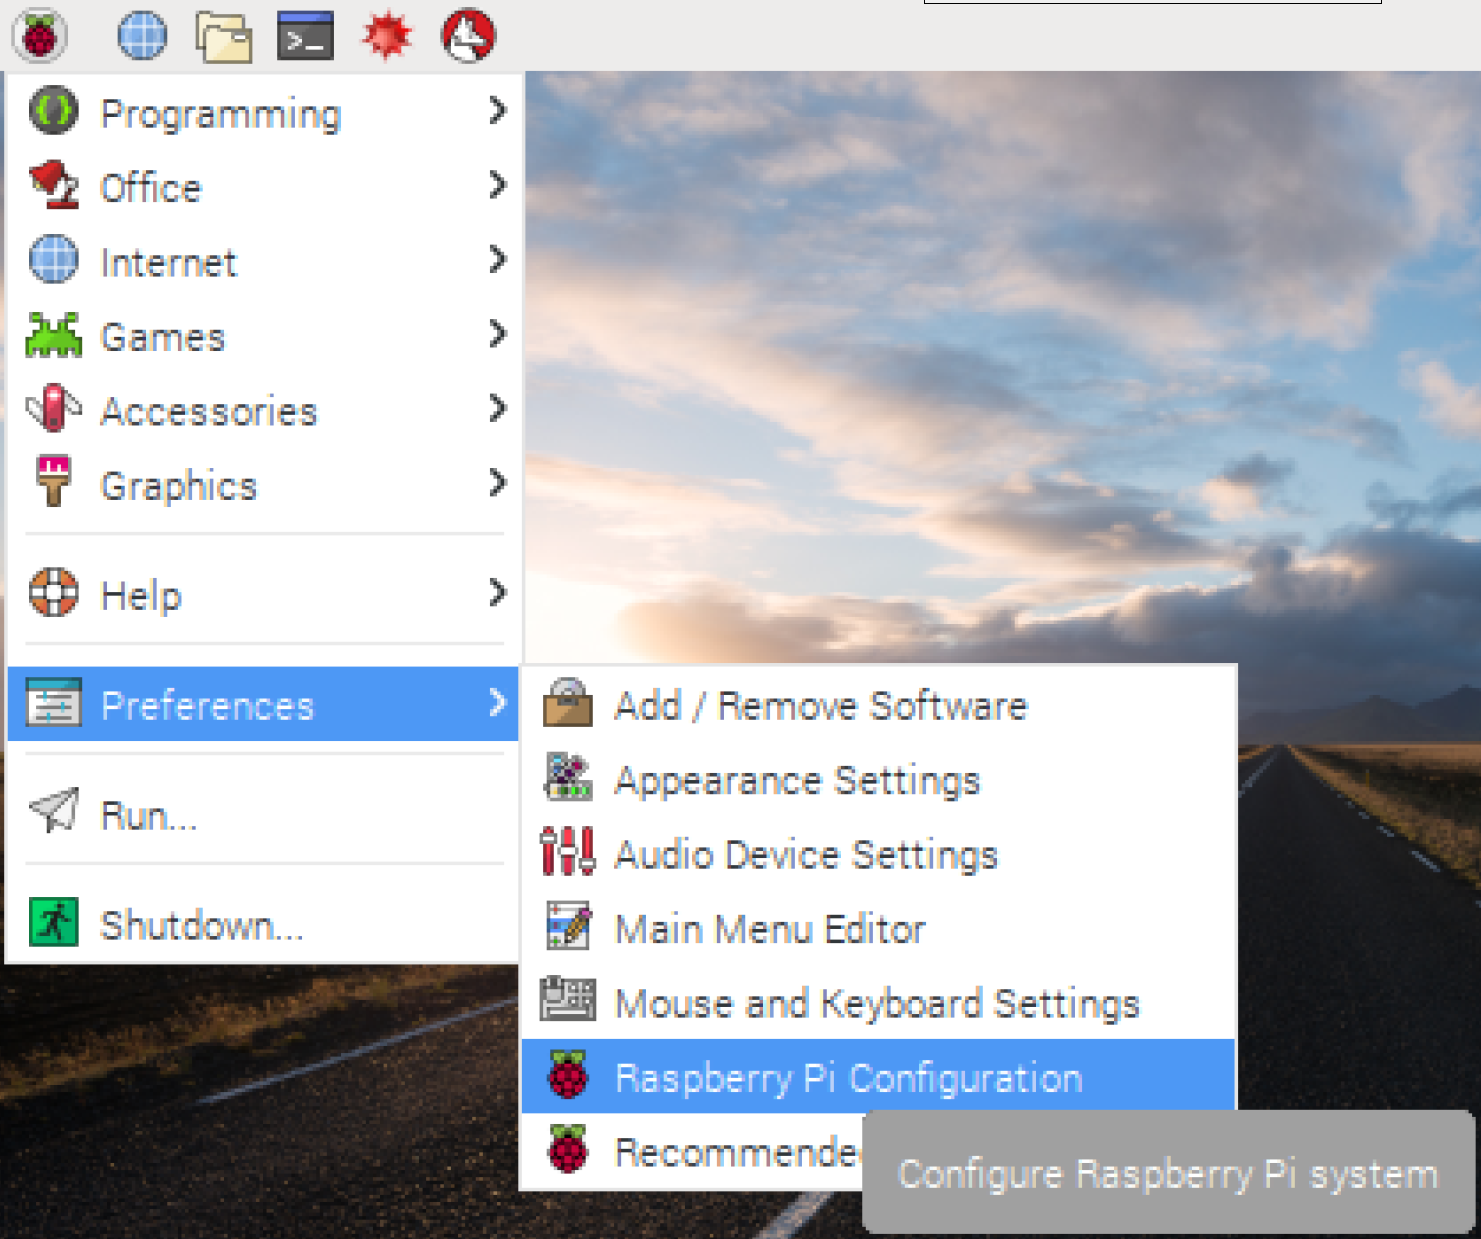
圖4 點選左上角樹莓派圖示,選「Preferences」 ->「Raspberry Pi Configuration」。[/caption]
[caption id="attachment_25207" align="aligncenter" width="468"]
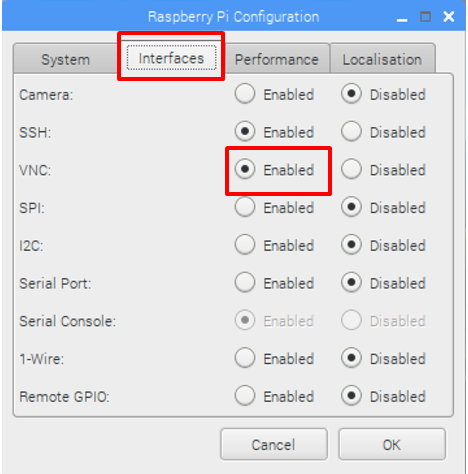
圖5 選「Interfaces」,再至VNC選「Enabled」。[/caption]
[caption id="attachment_25208" align="aligncenter" width="848"]
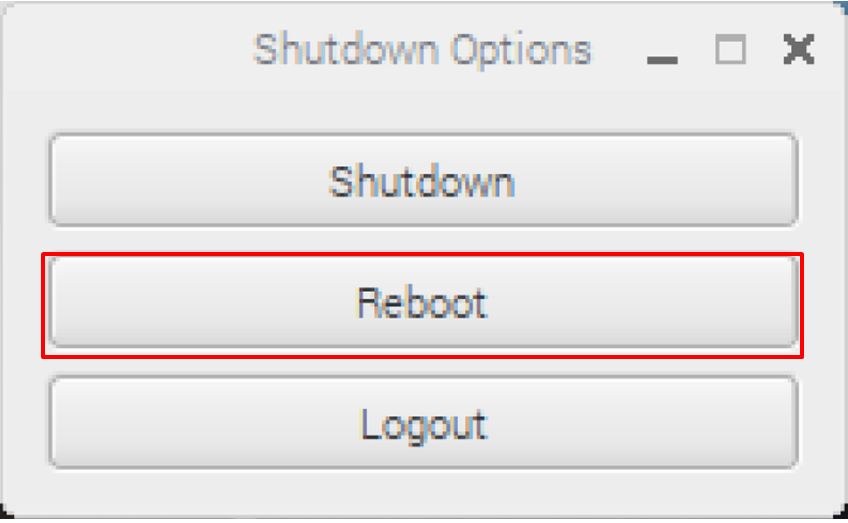
圖6 重新開機即可[/caption]
b.使用Putty或MobaXterm等軟體SSH遠端登入
在終端機輸入:
[pastacode lang="python" manual="%EF%81%AC%09sudo%20raspi-config%20" message="" highlight="" provider="manual"/]
[caption id="attachment_25209" align="aligncenter" width="662"]
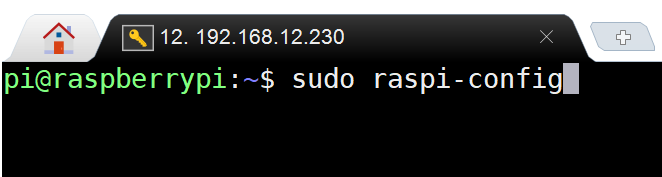
圖7[/caption]
會出現選項,如下圖:
[caption id="attachment_25210" align="aligncenter" width="1266"]
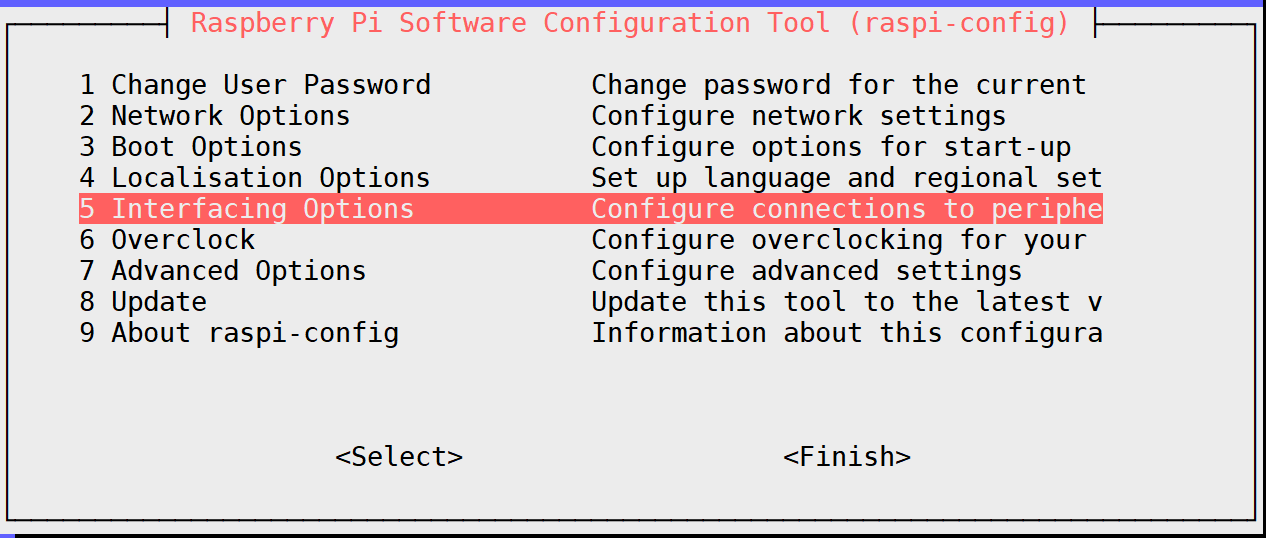
圖8 選「Interfacing Options」[/caption]
[caption id="attachment_25211" align="aligncenter" width="1287"]
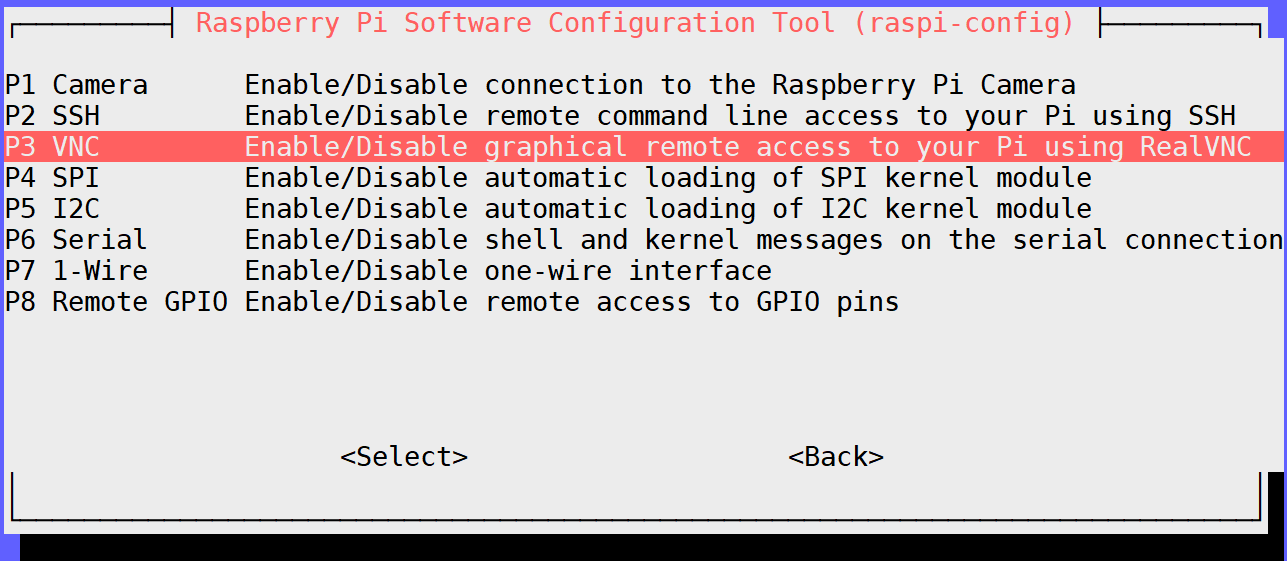
圖9 再選VNC選項[/caption]
[caption id="attachment_25212" align="aligncenter" width="985"]
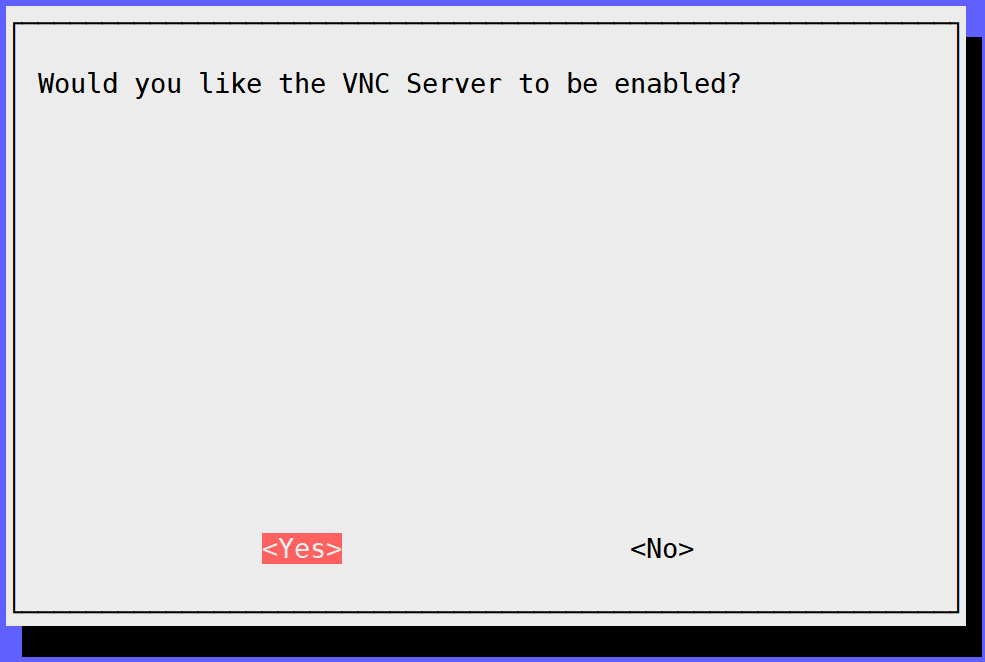
圖10 選擇即可設定完成[/caption]
2.在VNC官網註冊帳號
就和登入臉書或LINE等通訊軟體的概念一樣,要先註冊一組帳號,VNC官網:
https://www.realvnc.com/en/onboarding/home/ ,註冊完畢後,便可依自己的帳號登入。
[caption id="attachment_25213" align="aligncenter" width="1020"]
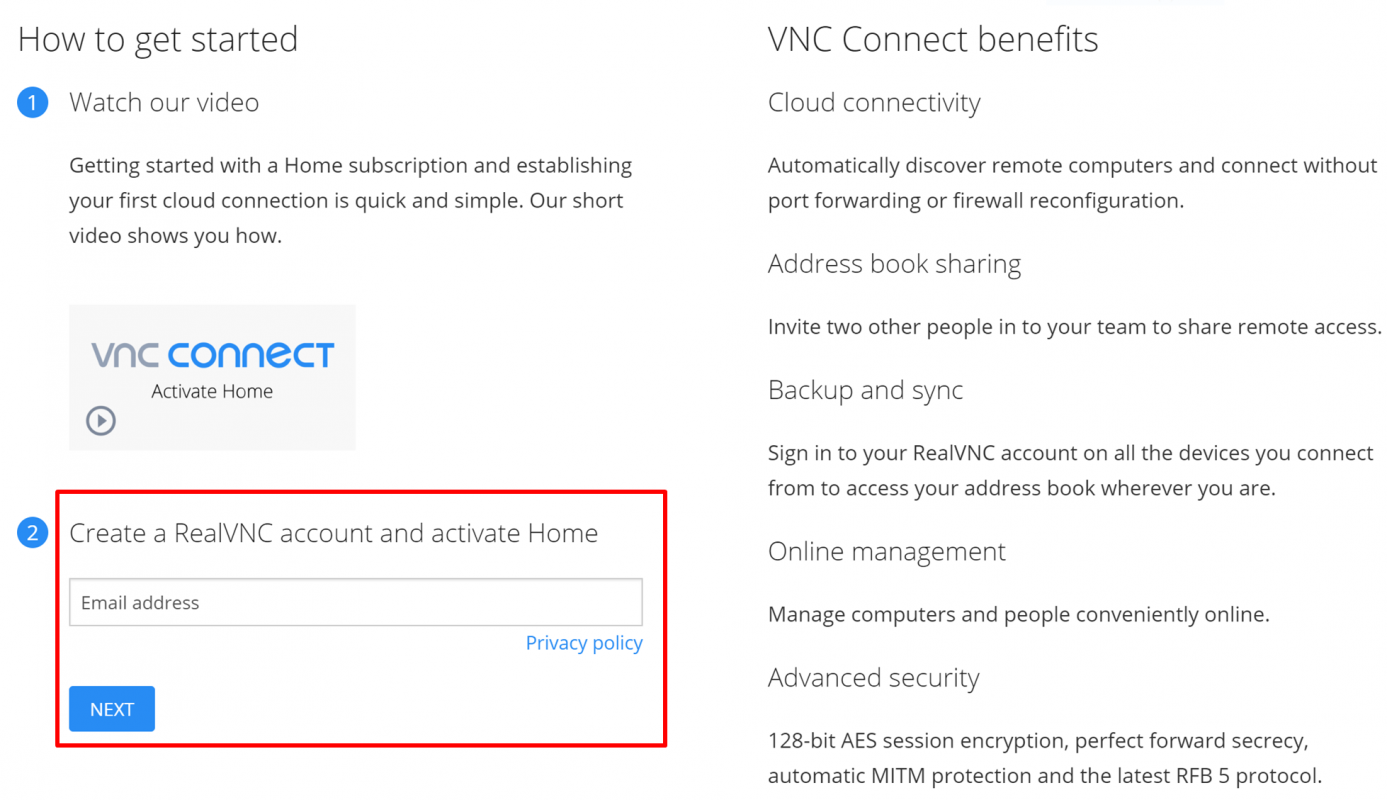
圖11 建立新帳號[/caption]
[caption id="attachment_25214" align="aligncenter" width="1142"]
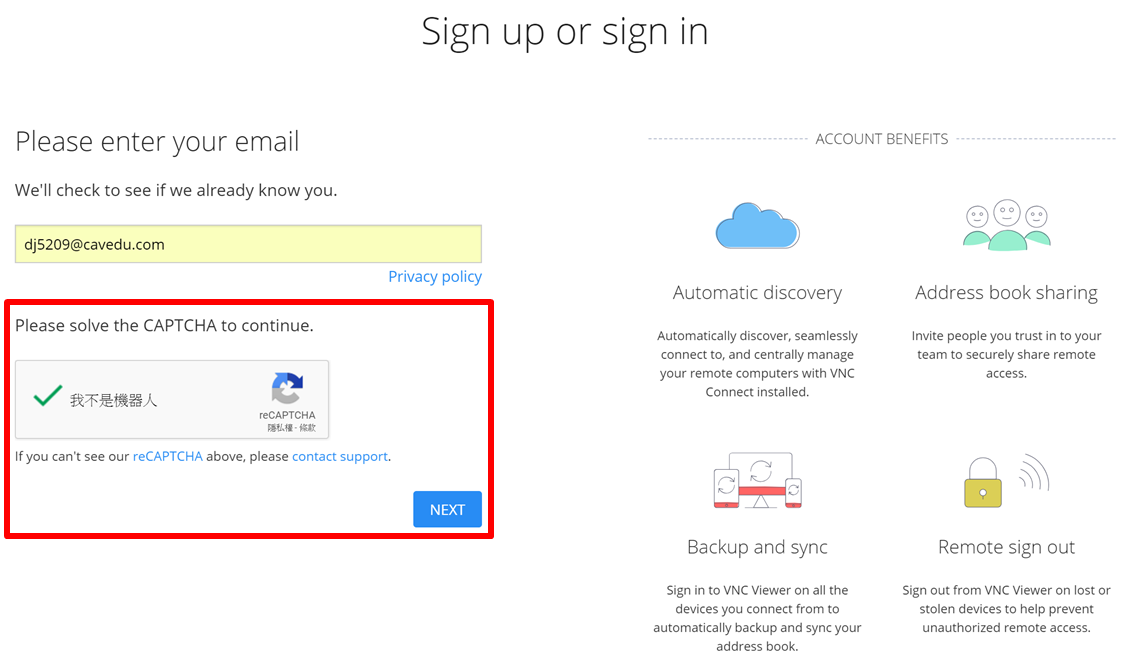
圖12 勾選「我不是機器人」選項[/caption]
[caption id="attachment_25215" align="aligncenter" width="1988"]
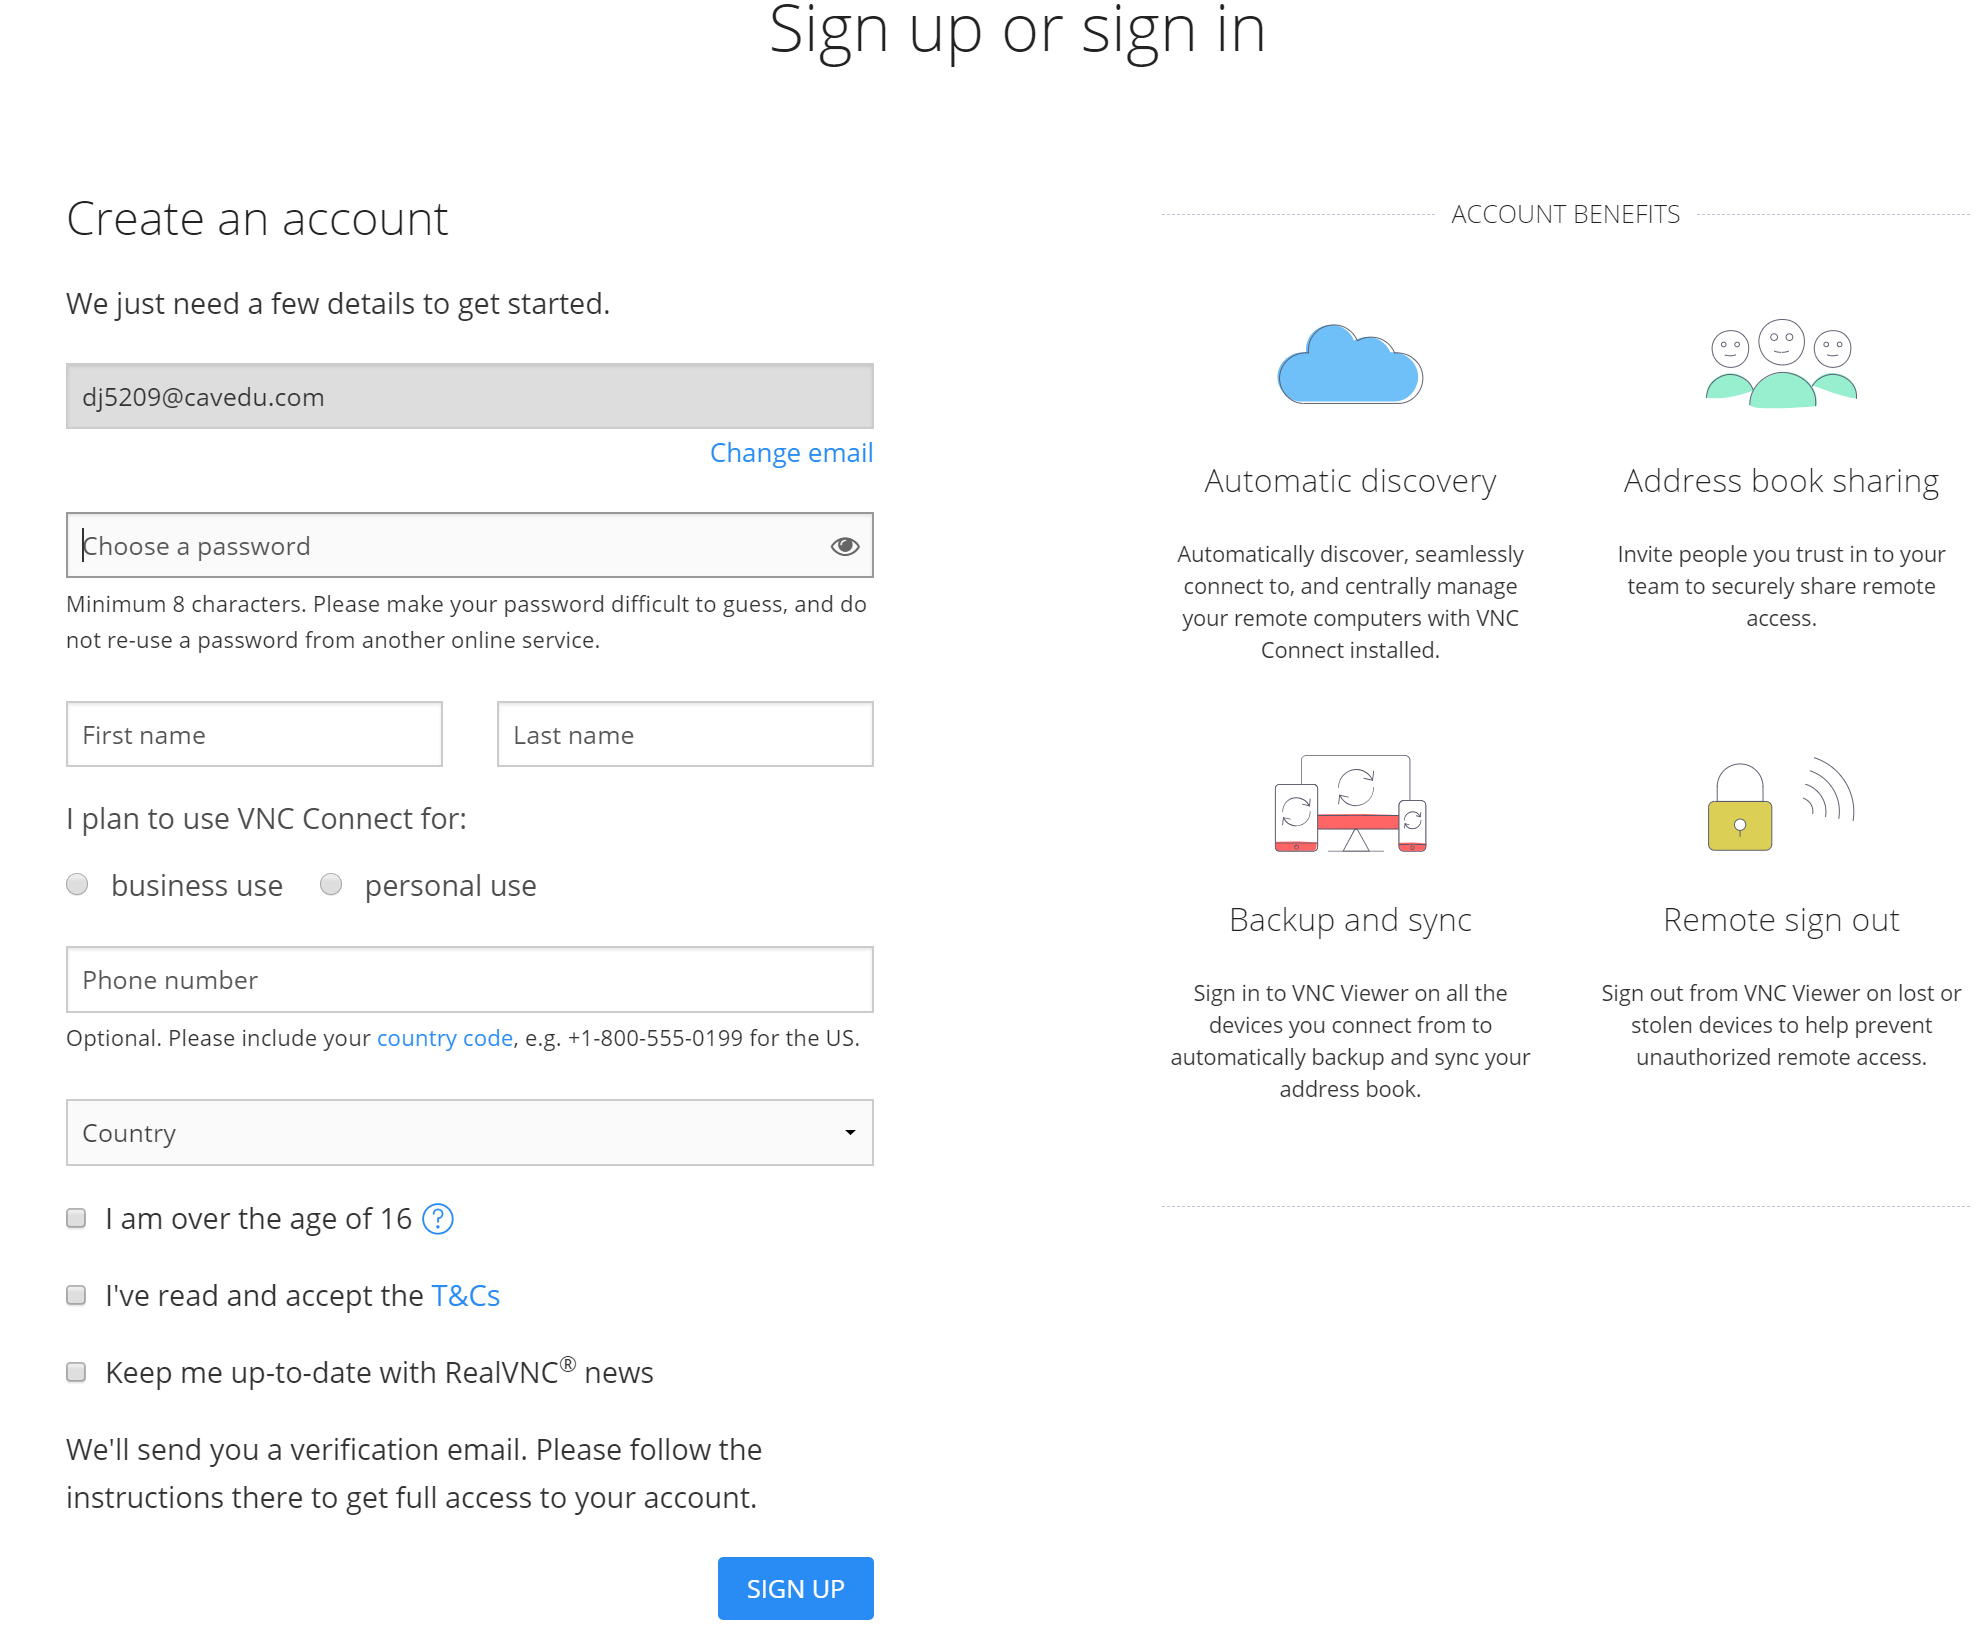
圖13 填寫個人相關資訊[/caption]
[caption id="attachment_25216" align="aligncenter" width="1741"]
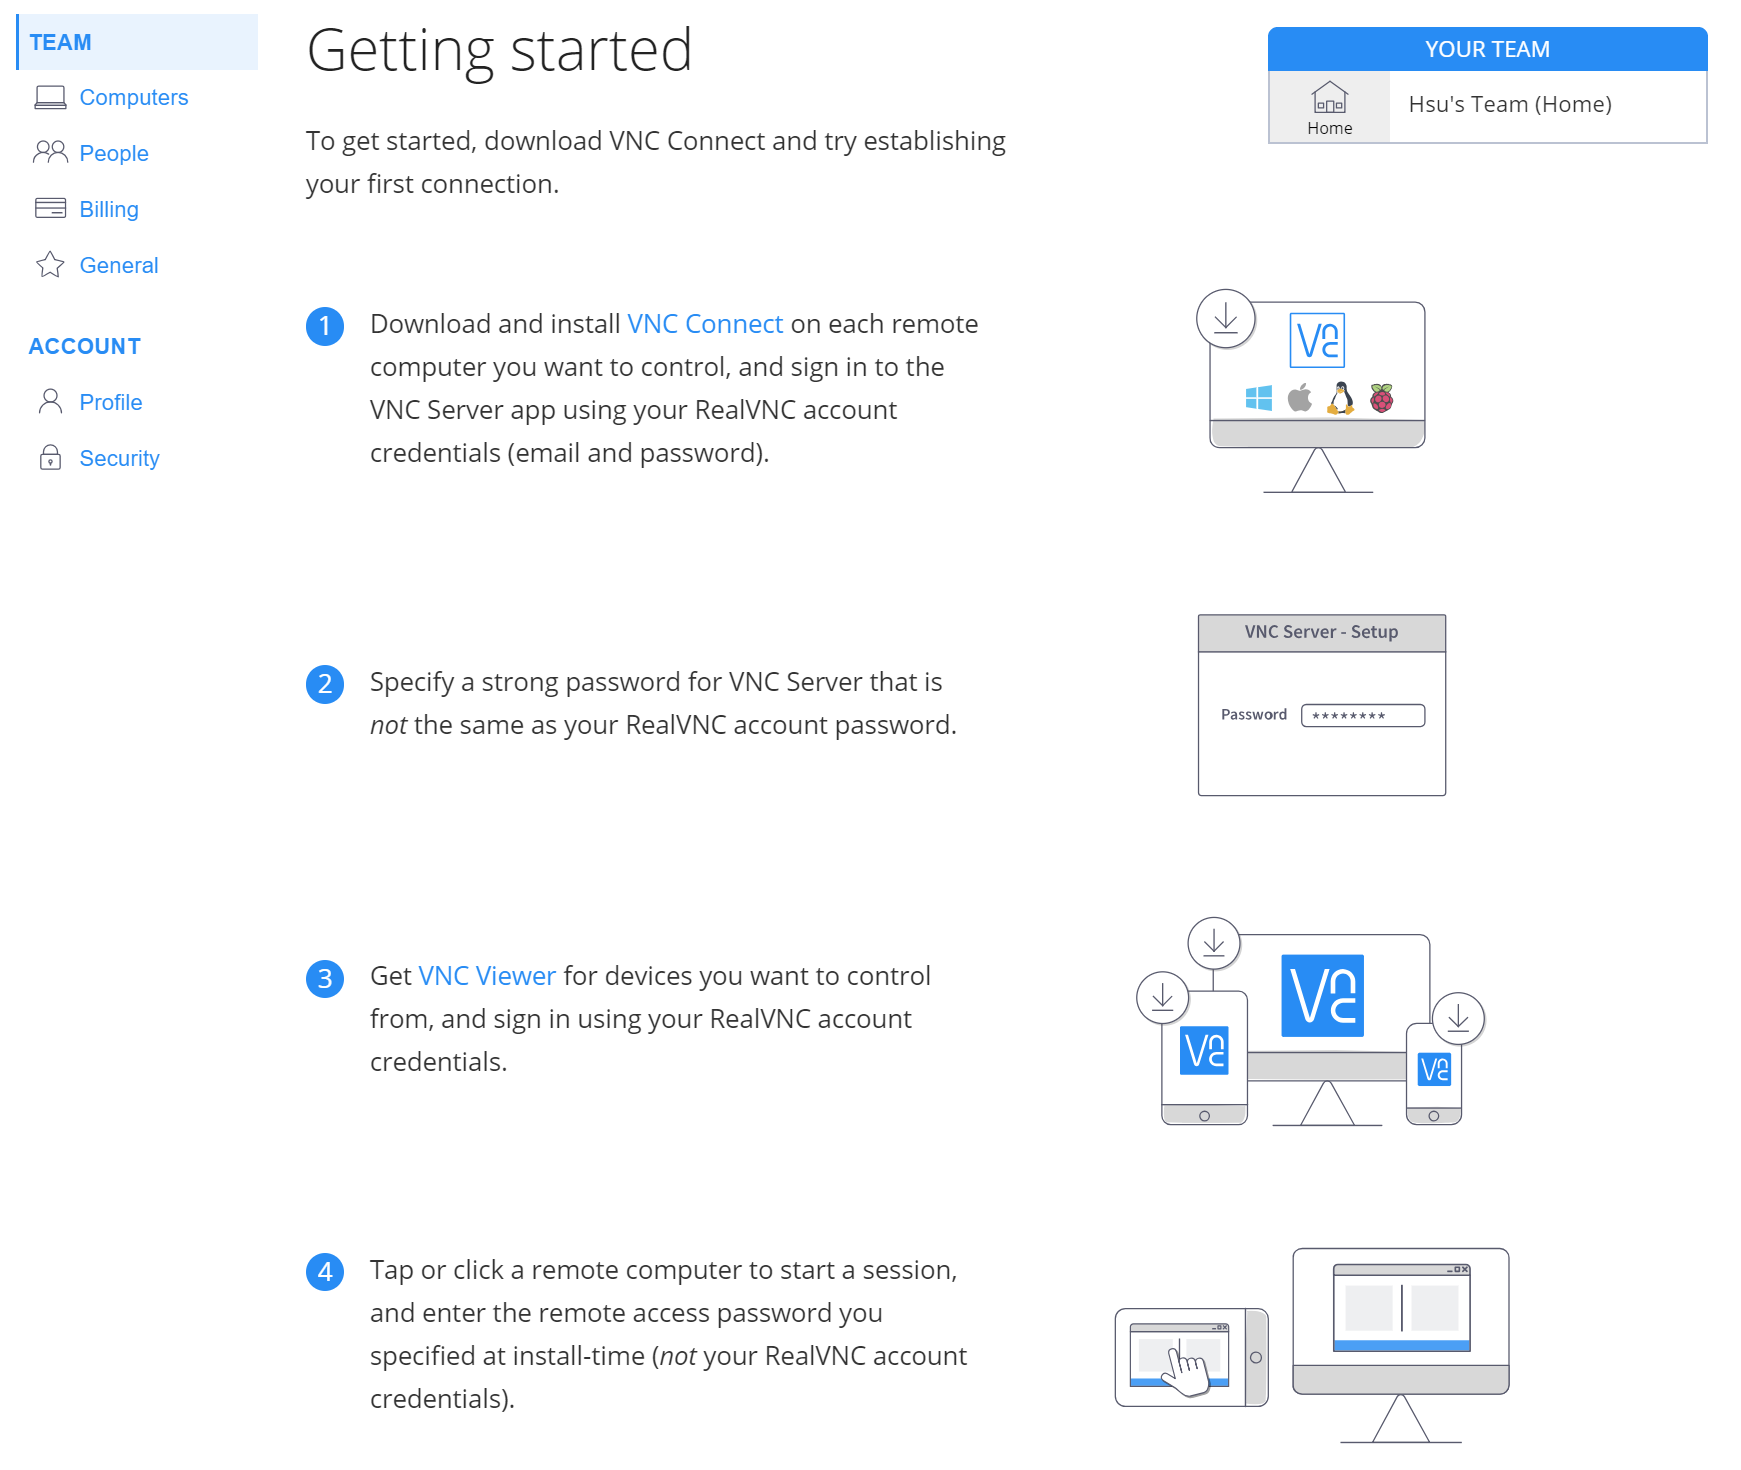
圖14 其它行動裝置教學[/caption]
由於RealVNC可由帳號登入,所以不管是電腦或是可上網的行動裝置,只要安裝RealVNC Viewer,皆可遠端登入,讓我們以電腦為例子。
[caption id="attachment_25217" align="aligncenter" width="1188"]
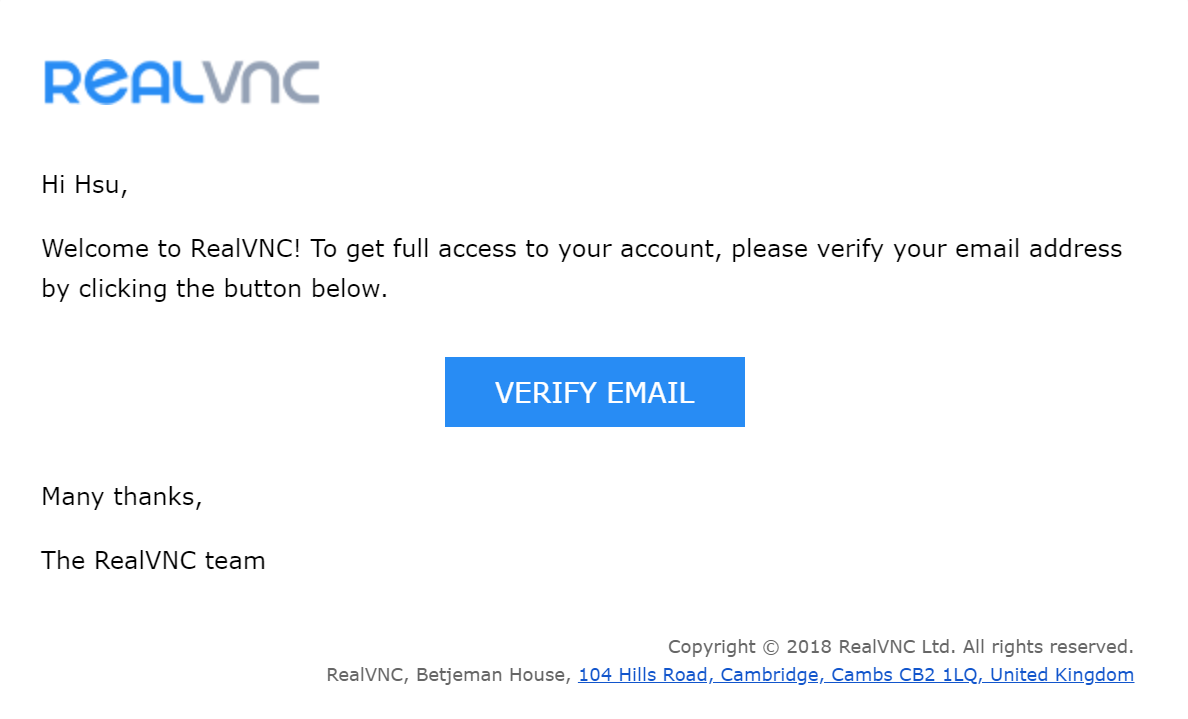
圖15 收到驗證信件[/caption]
[caption id="attachment_25218" align="aligncenter" width="753"]

圖16 註冊成功[/caption]
如圖15,當收到驗證信件時,請按下「VERIFY EMAIL」按鈕後,會跳轉至官方頁面,顯示如上圖16,表示註冊成功。
[caption id="attachment_25219" align="aligncenter" width="1020"]
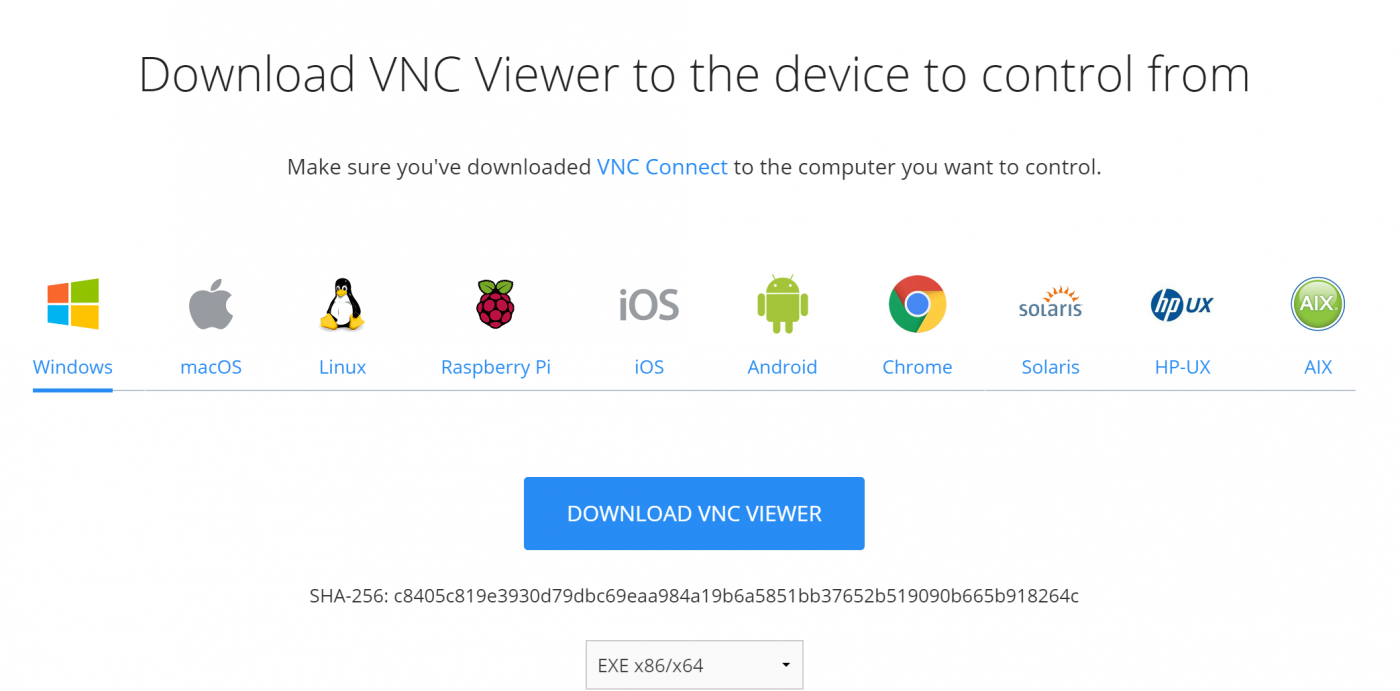
圖17 下載RealVNC Viewer(以Windows版本為例)[/caption]
[caption id="attachment_25220" align="aligncenter" width="1778"]
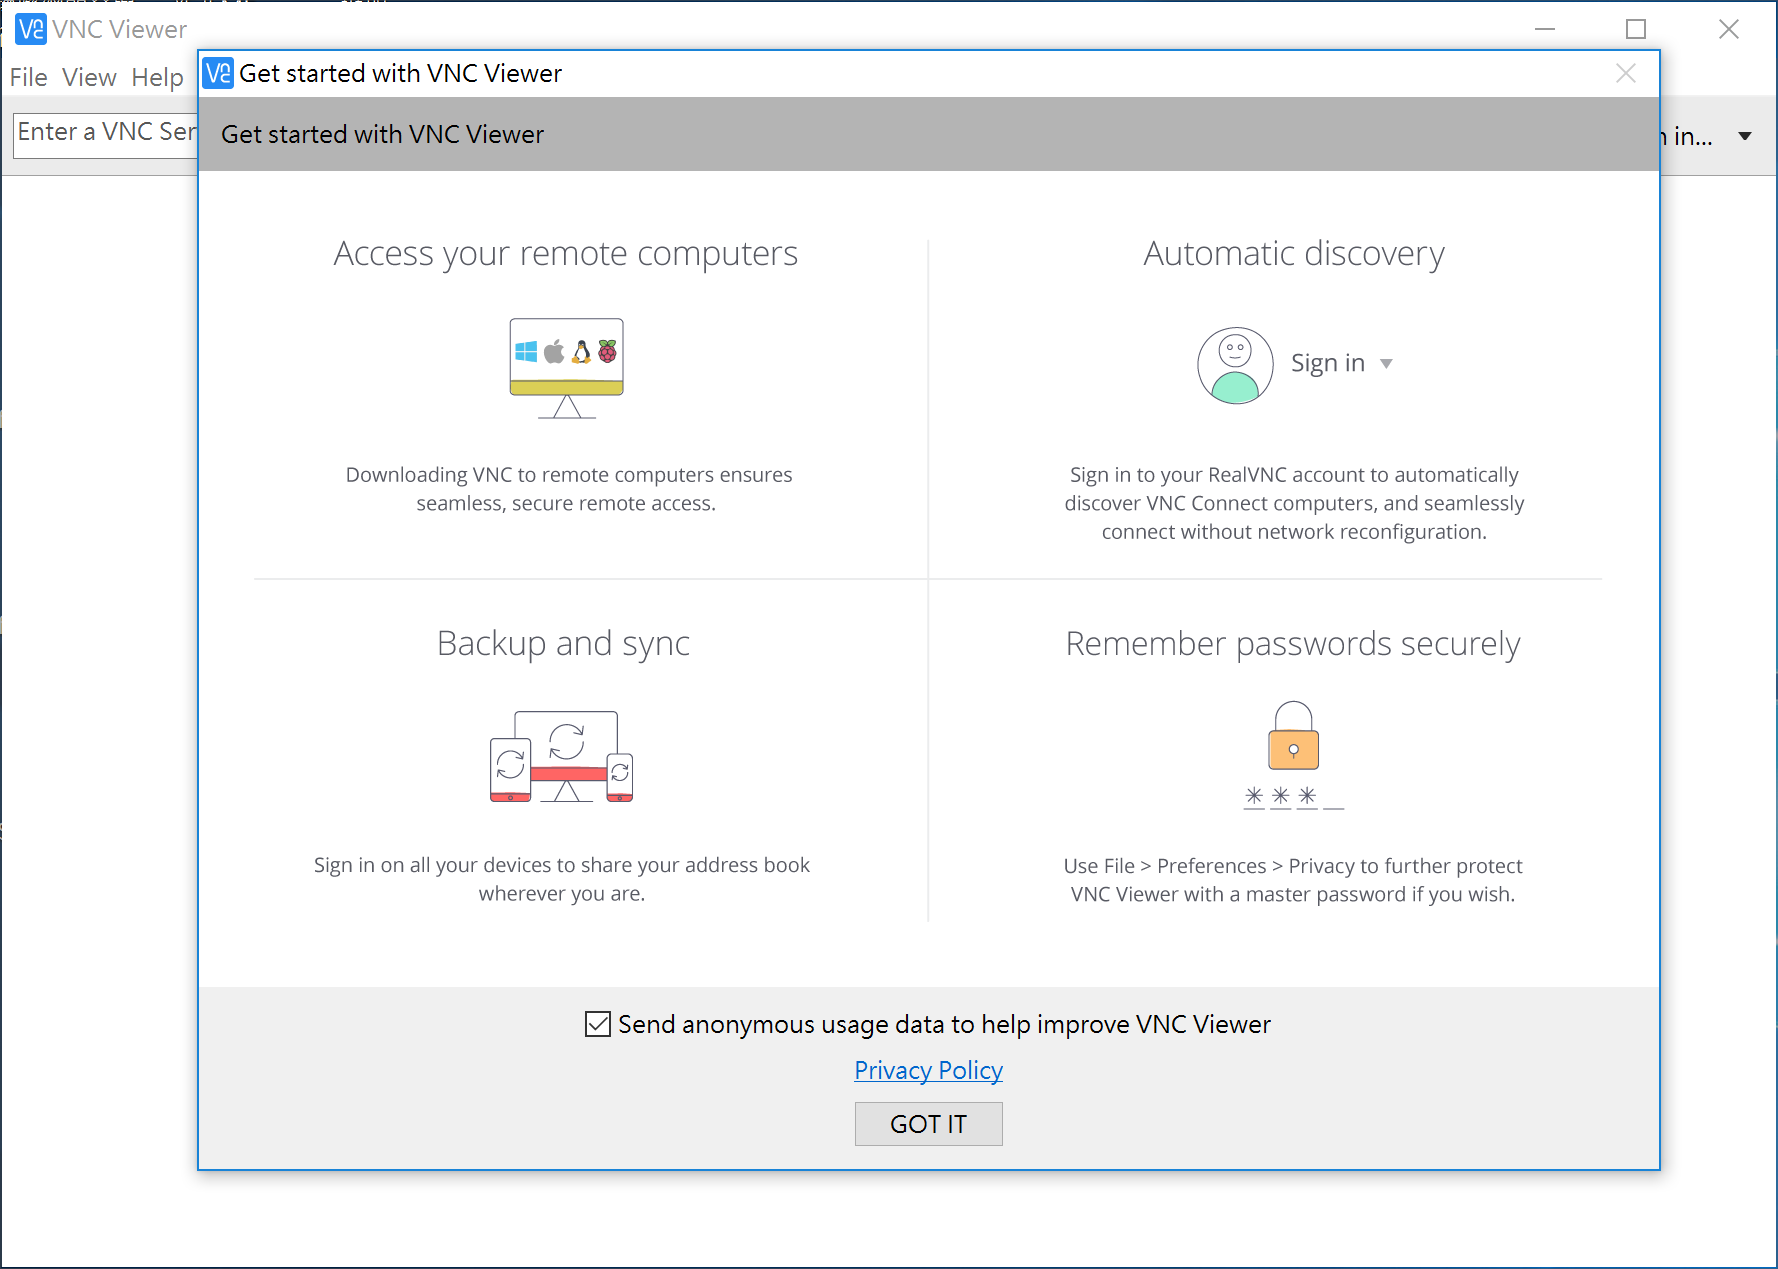
圖18 安裝完成畫面[/caption]
[caption id="attachment_25221" align="aligncenter" width="1844"]
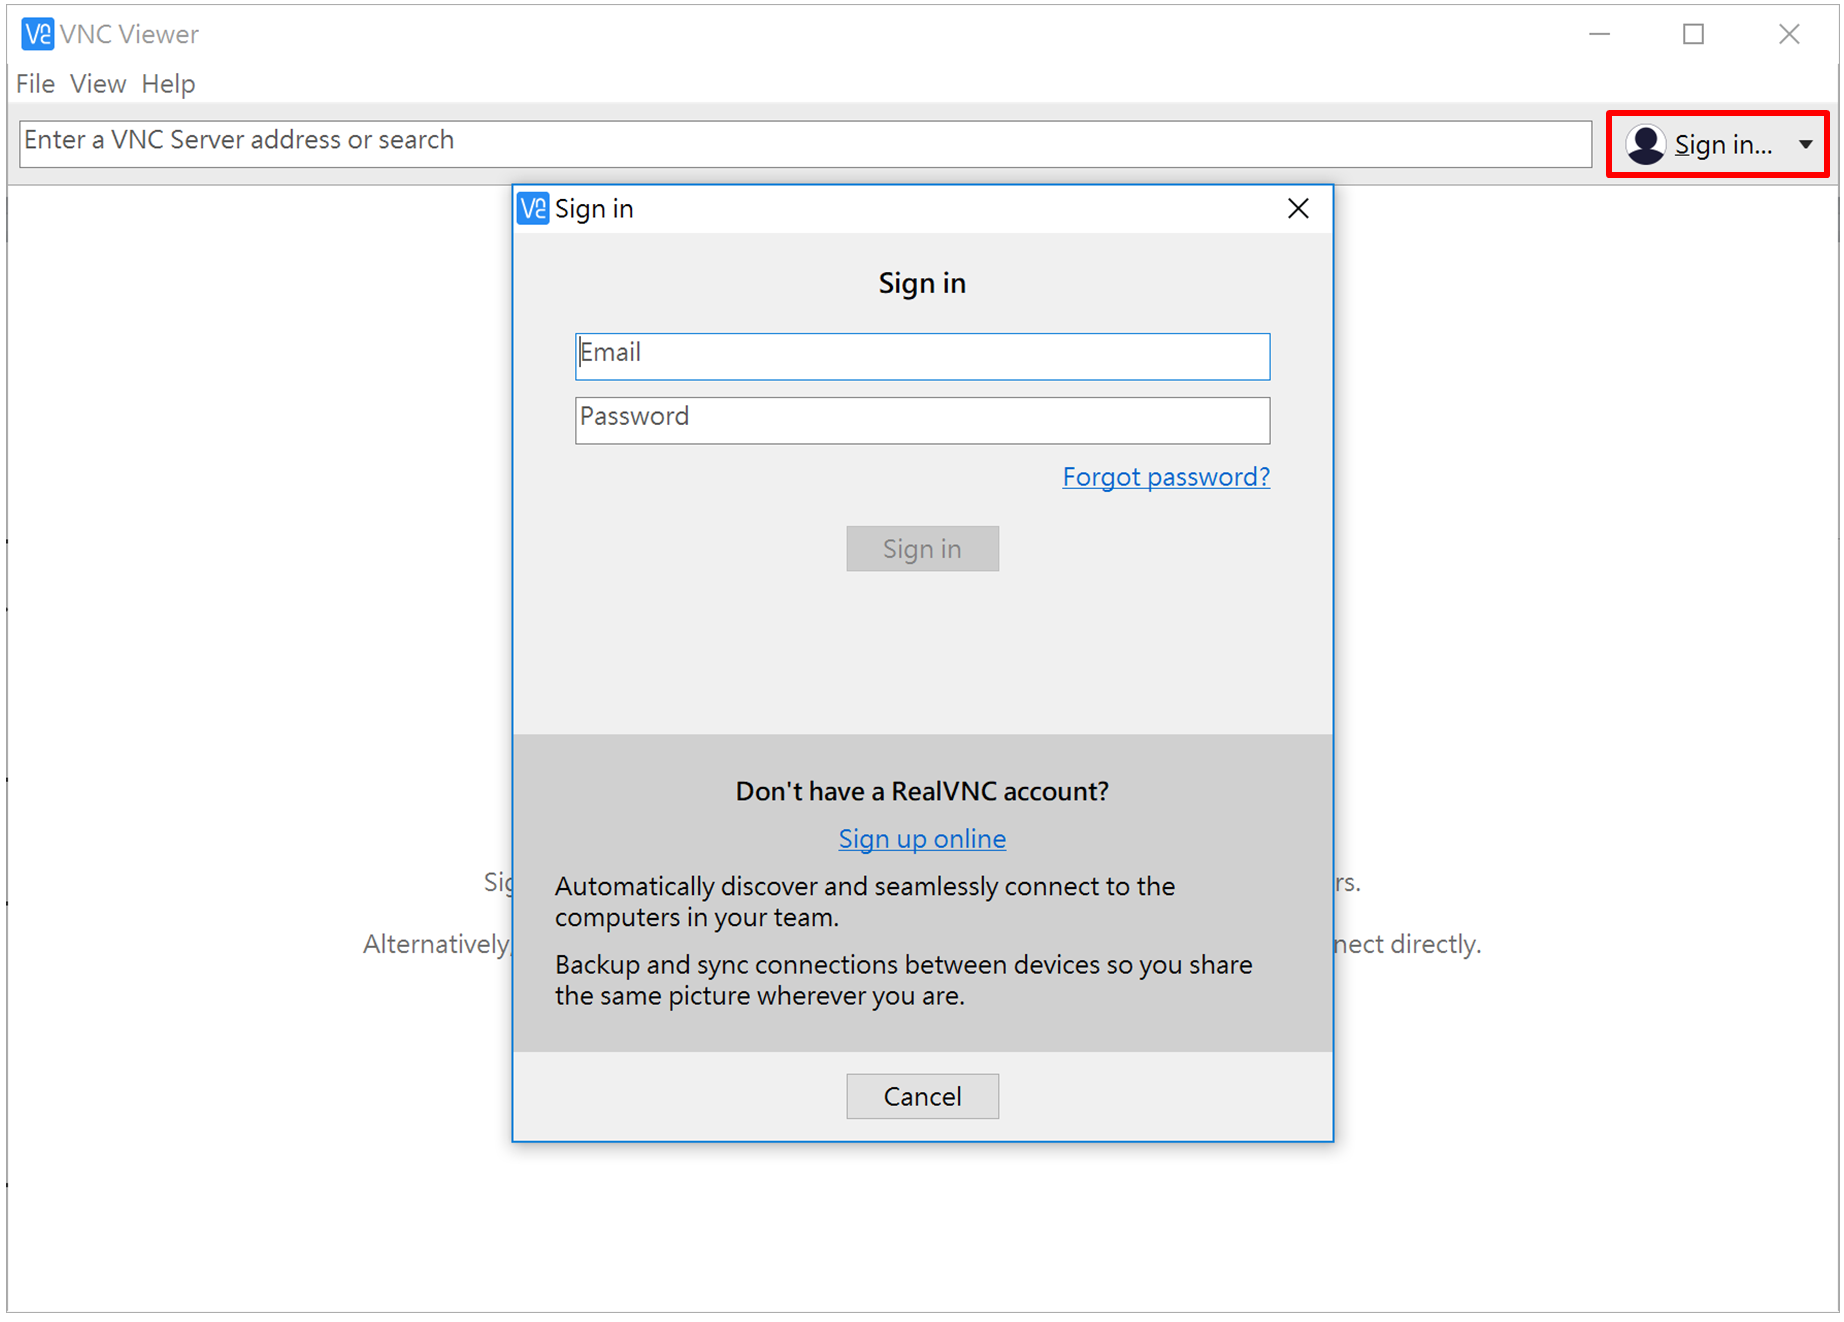
圖19 按右上角「Sign in」輸入帳號[/caption]
[caption id="attachment_25222" align="aligncenter" width="1776"]
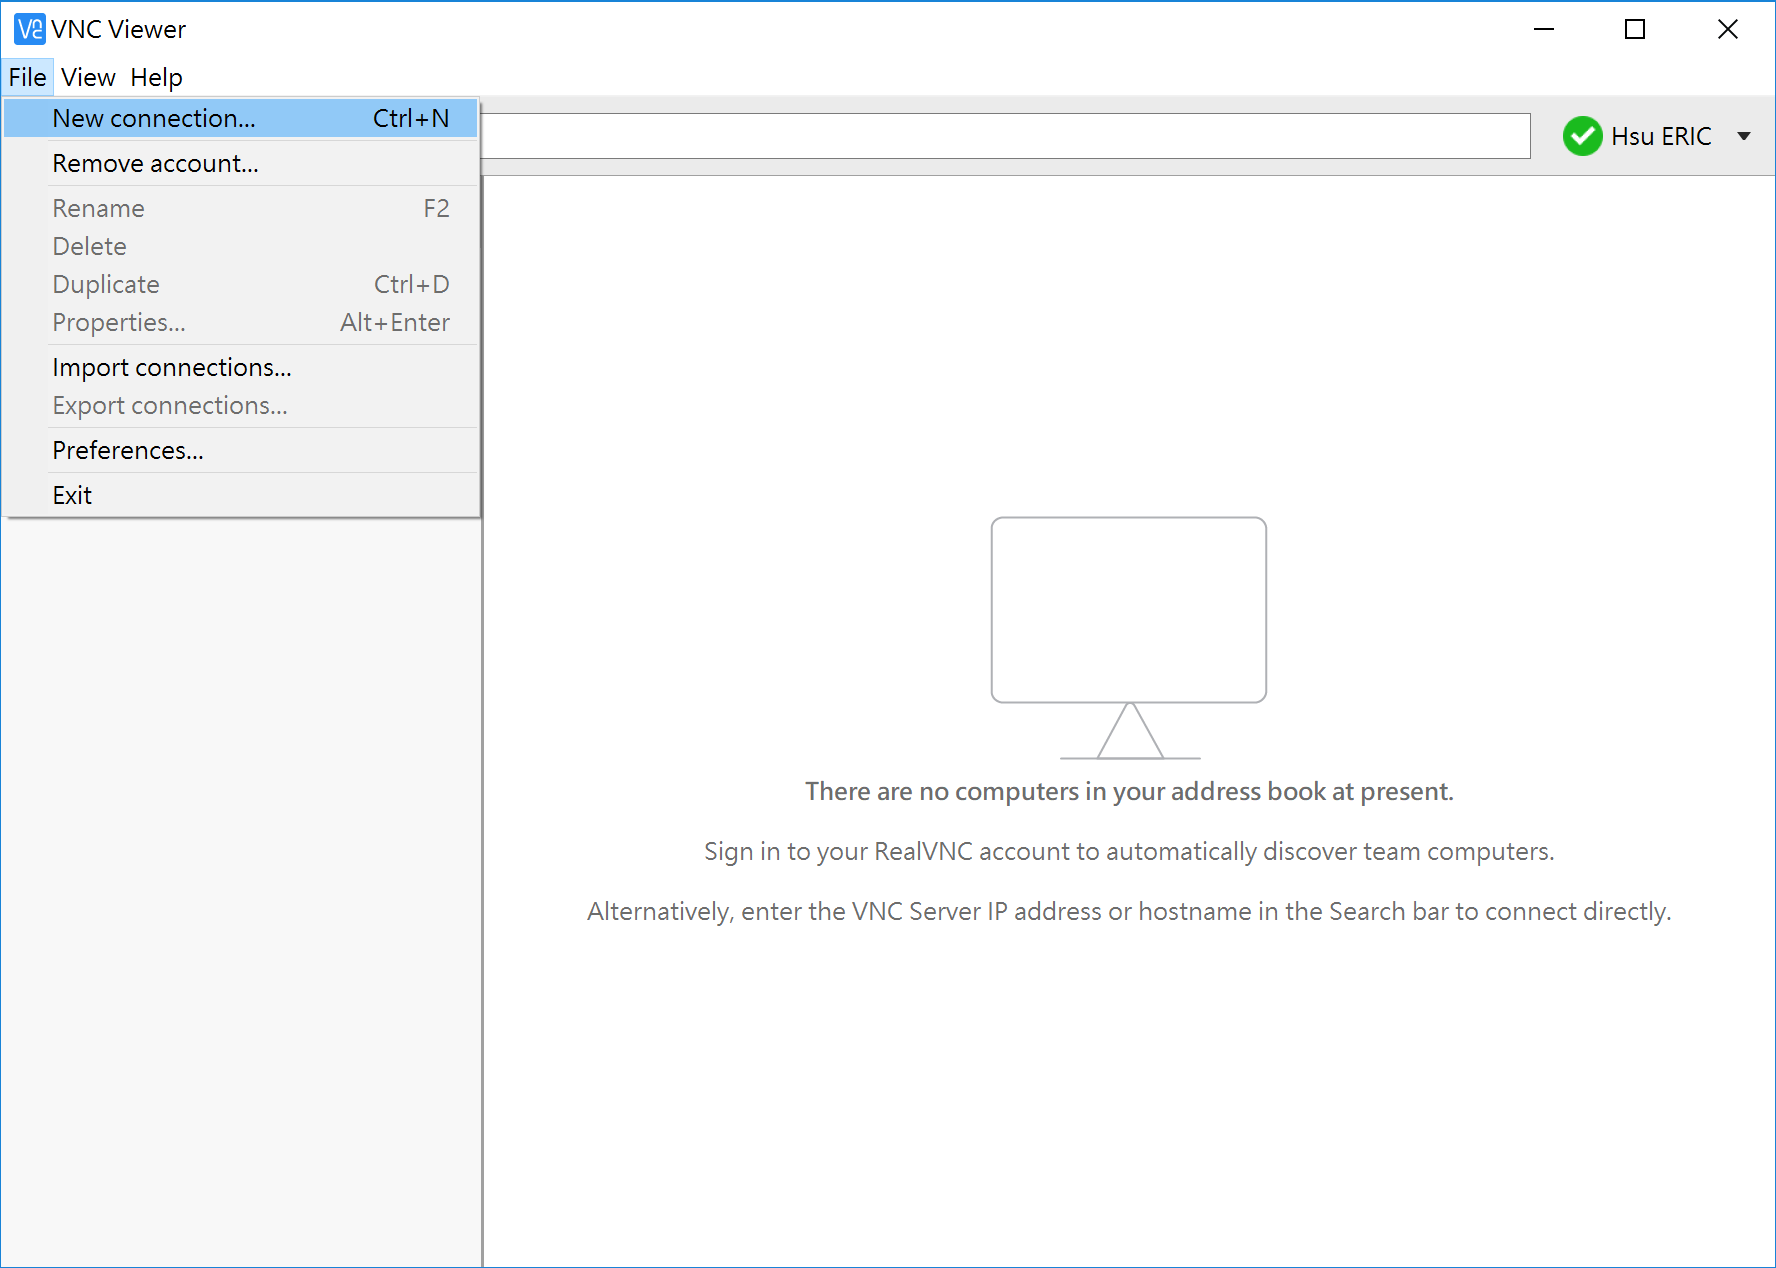
圖20 登入畫面,右邊為欲登入Raspberry Pi的區域。[/caption]
4.遠端登入Raspberry Pi
[caption id="attachment_25223" align="aligncenter" width="1846"]
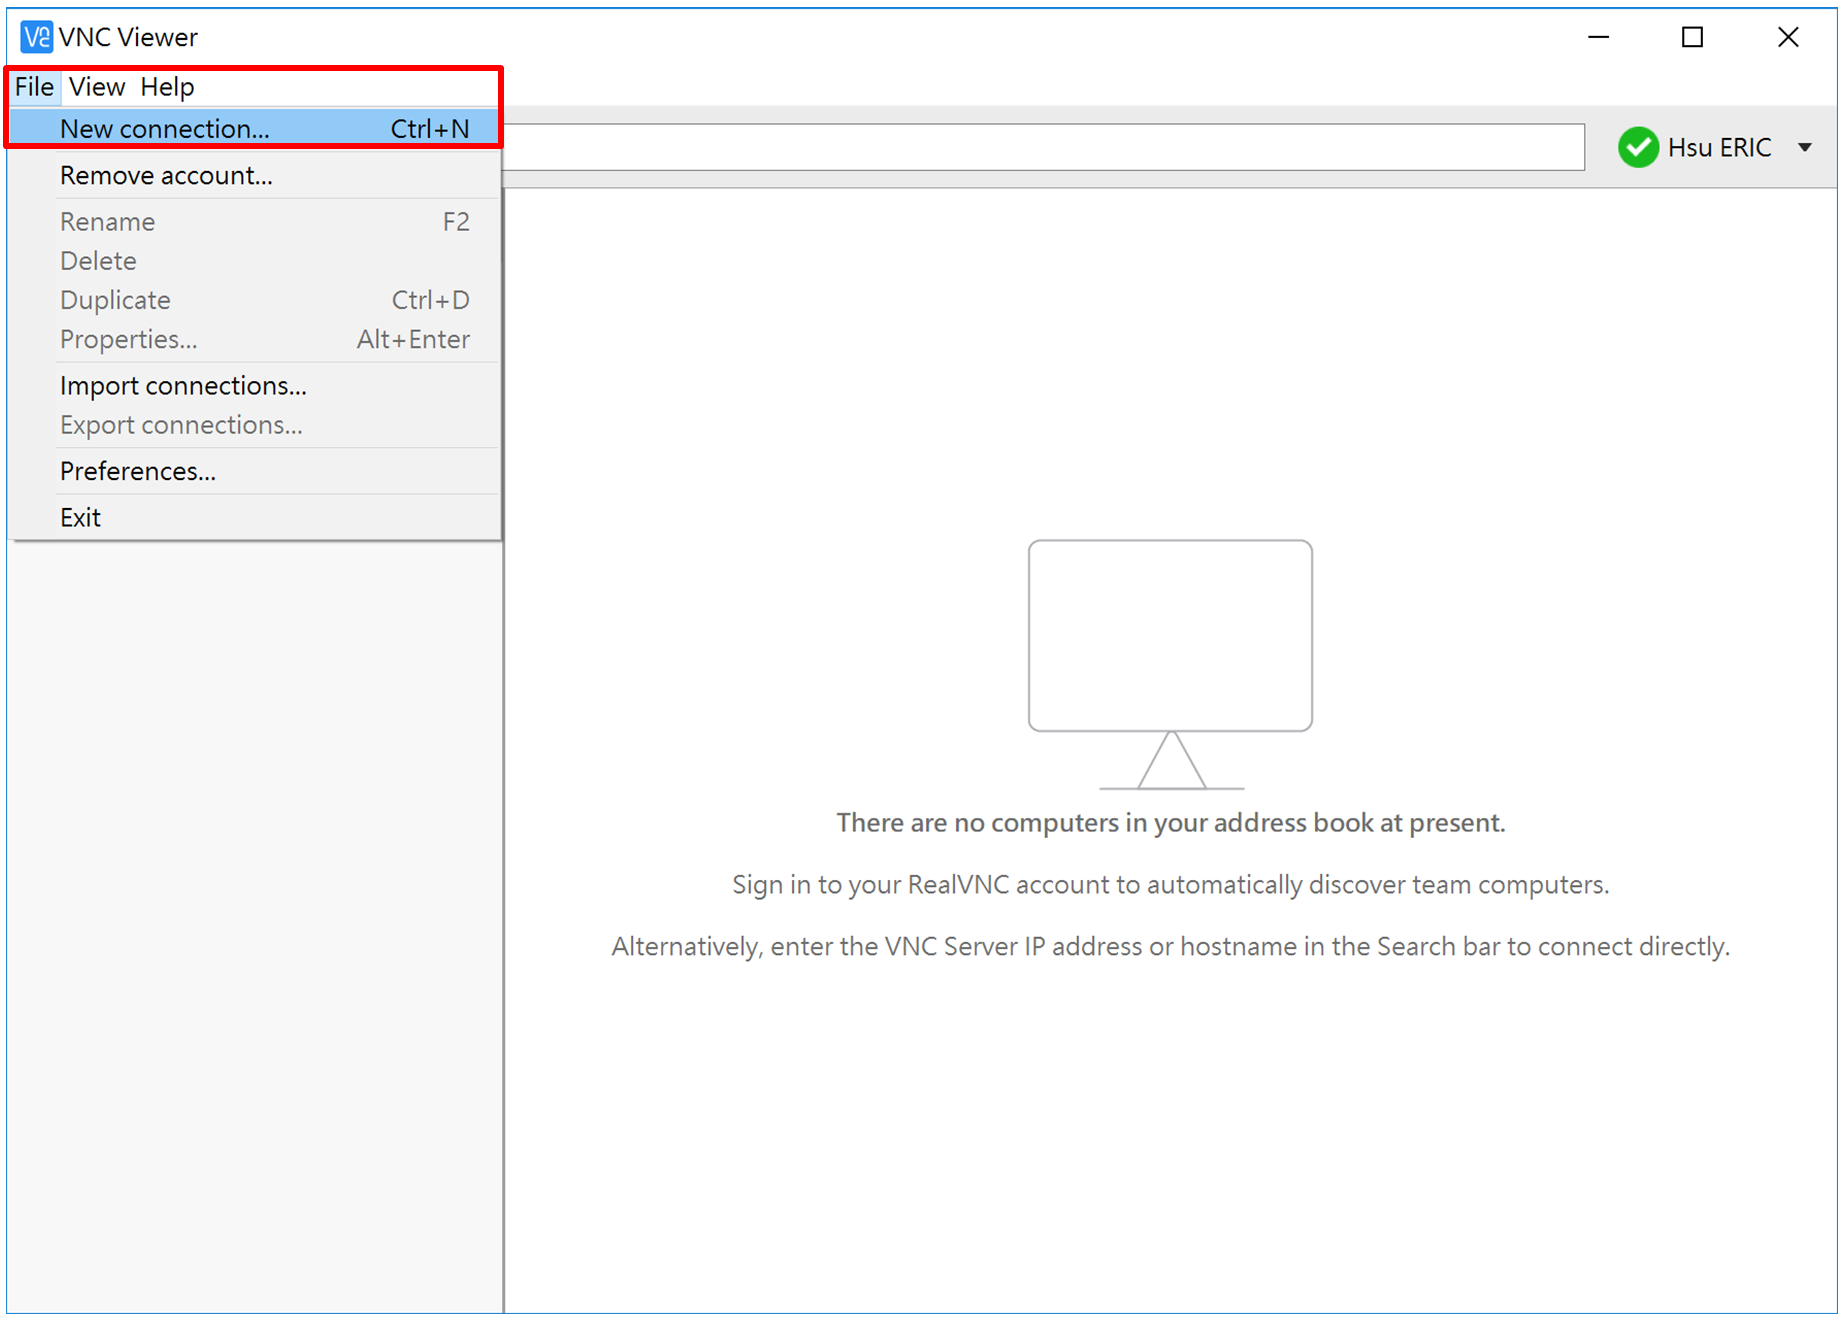
圖21 新增連線對象,選「File」->「New connection」。[/caption]
[caption id="attachment_25224" align="aligncenter" width="976"]
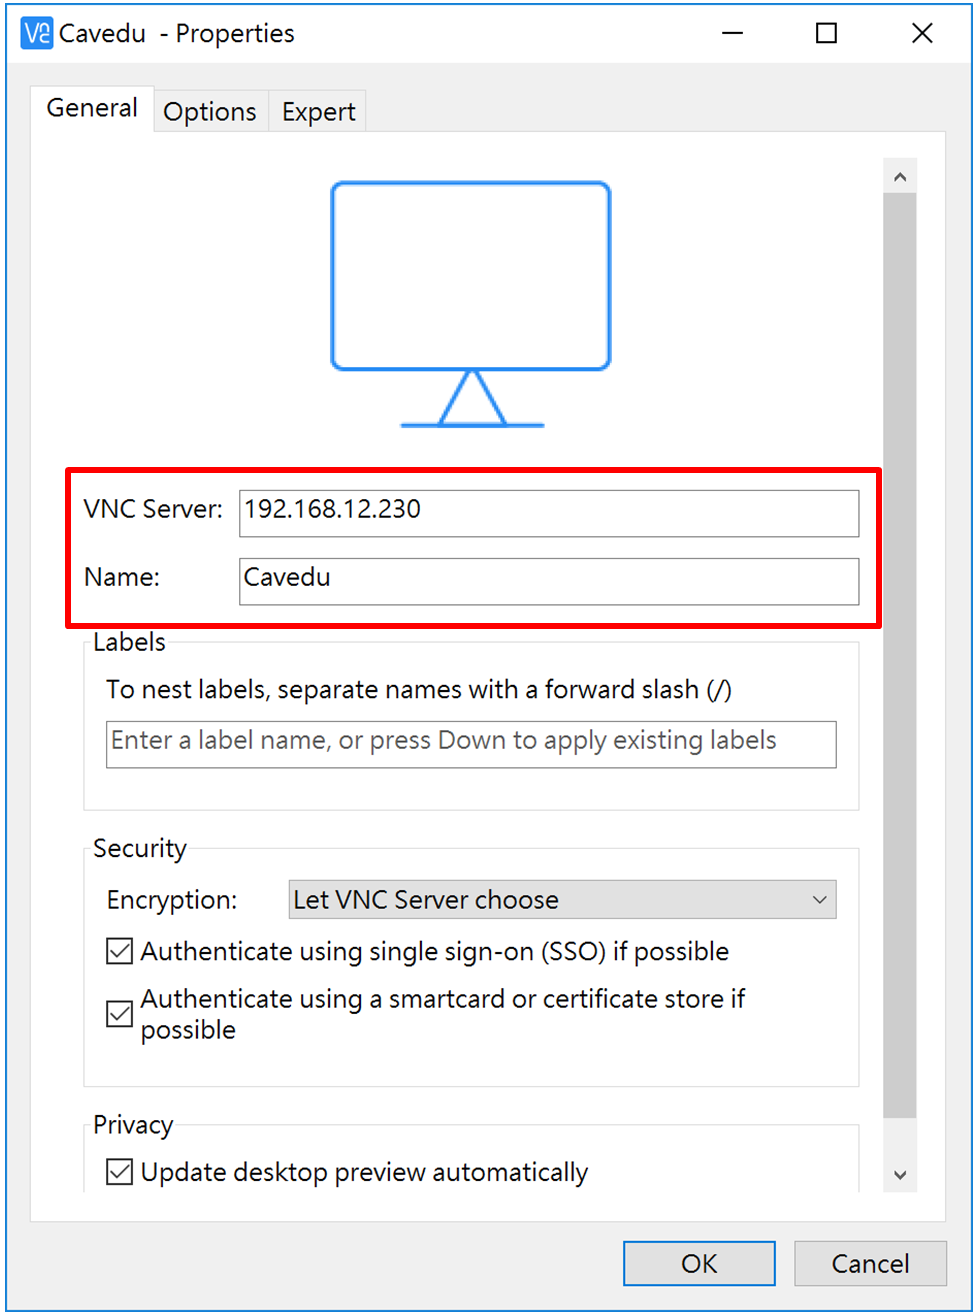
圖22 輸入Raspberry Pi的ip 位置及名稱後,按下OK。[/caption]
[caption id="attachment_25225" align="aligncenter" width="1778"]
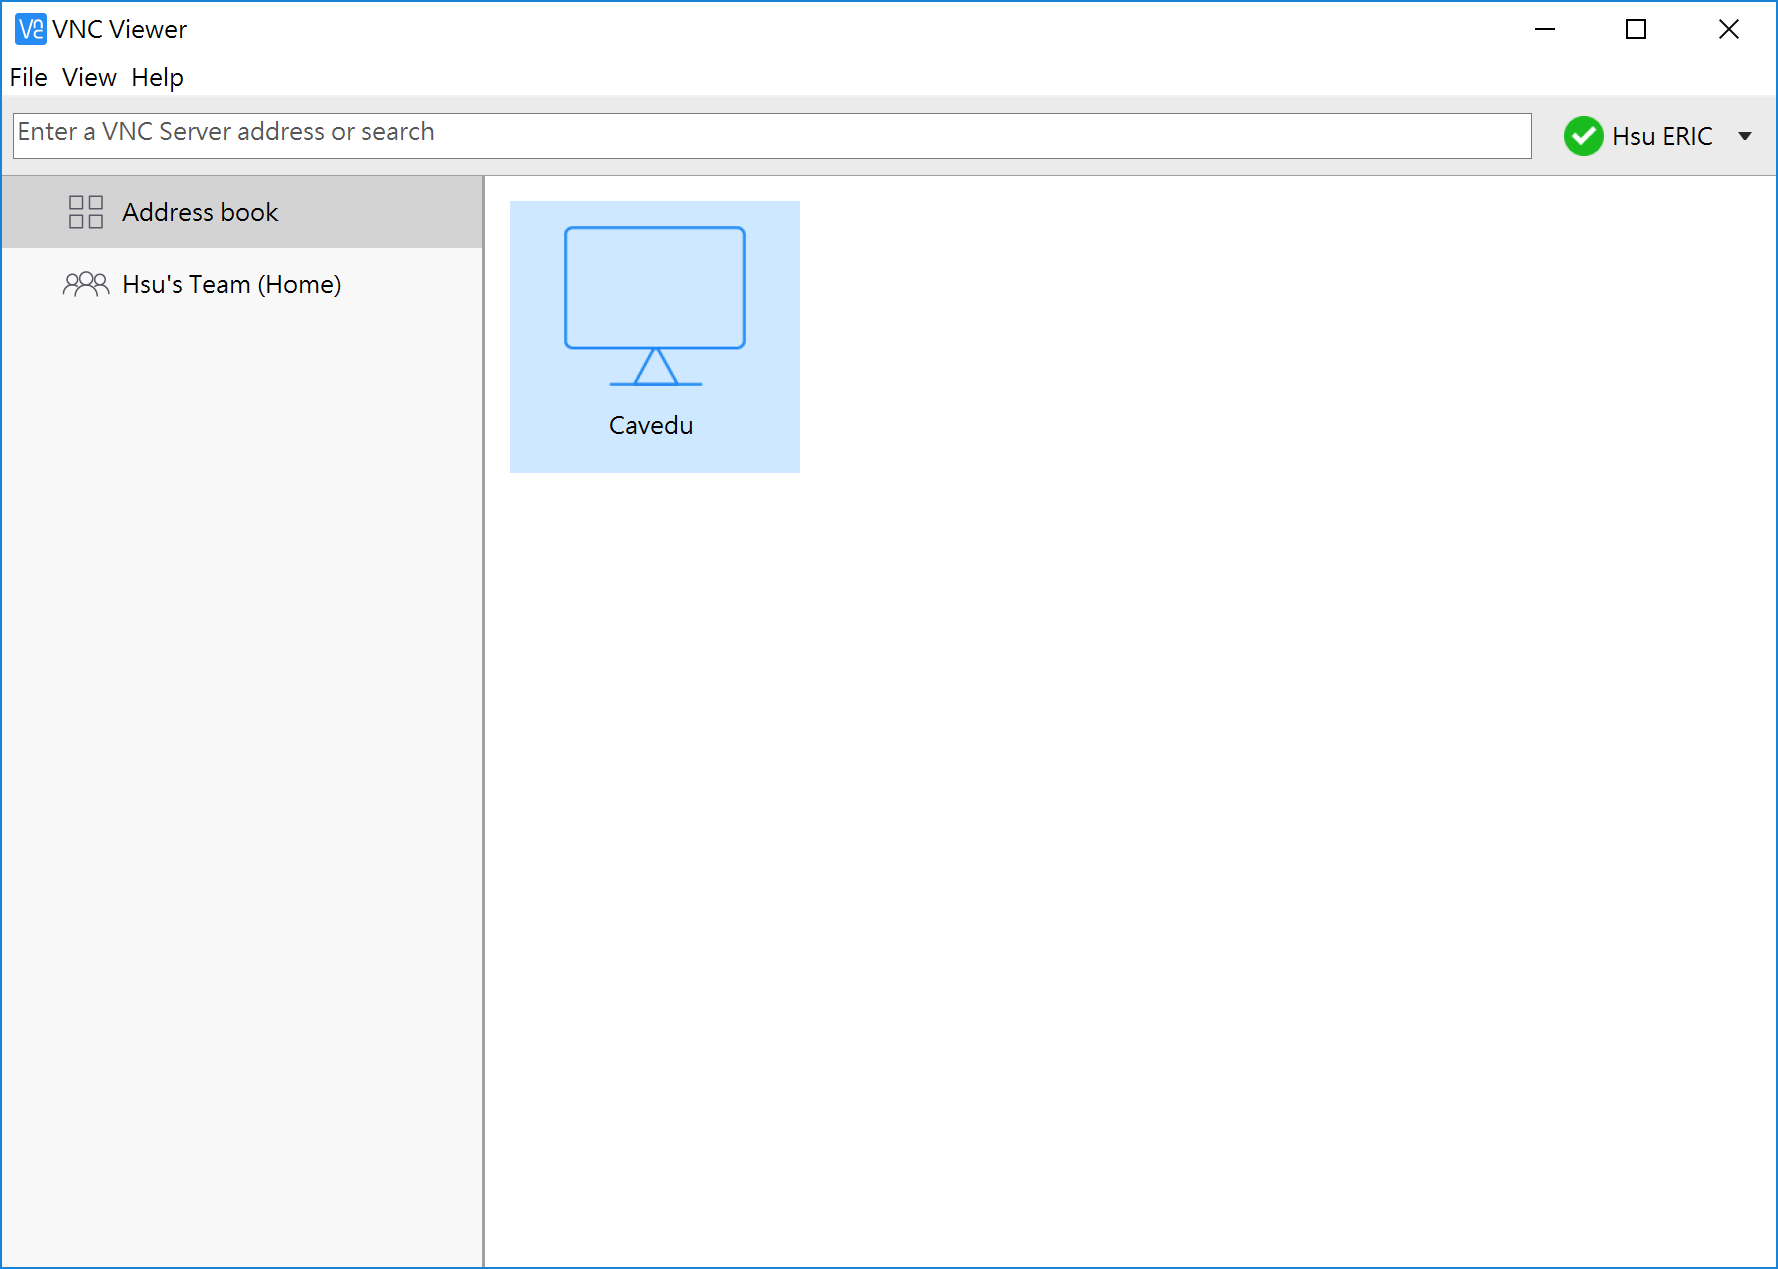
圖23 成功新增連線對象Raspberry Pi[/caption]
[caption id="attachment_25226" align="aligncenter" width="978"]
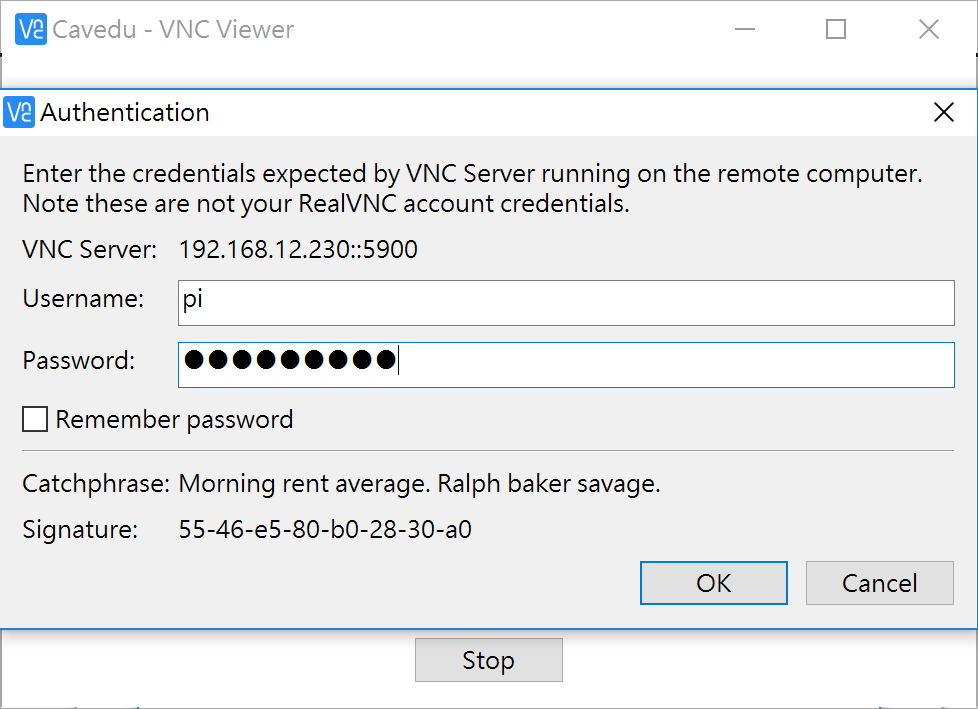
圖24 輸入驗證的使用者和密碼[/caption]
這裡預設Username為「pi」,Password為「raspberry」。
[caption id="attachment_25227" align="aligncenter" width="1778"]
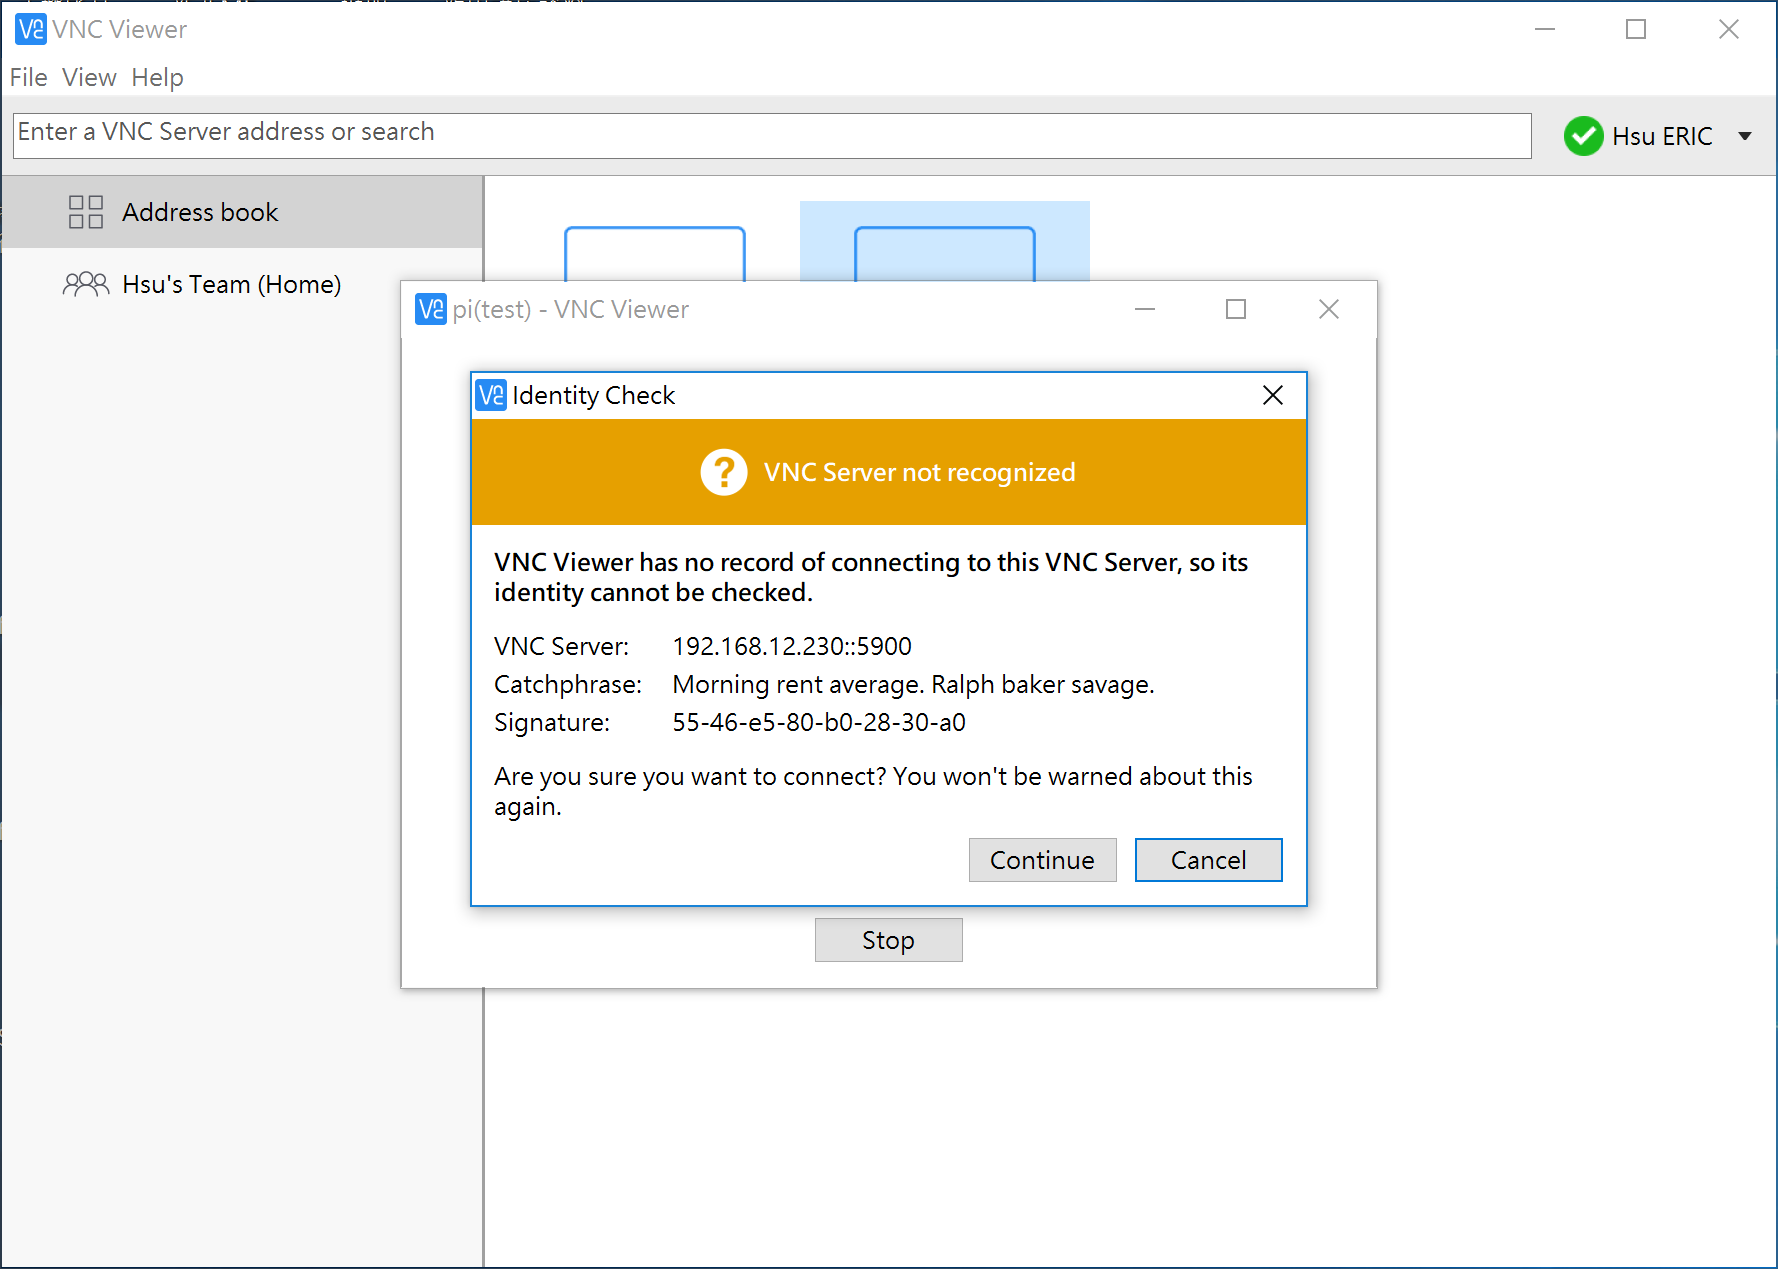
圖25 第一次連線會出現認證警告,按「Continue」即可。[/caption]
[caption id="attachment_25228" align="aligncenter" width="1413"]
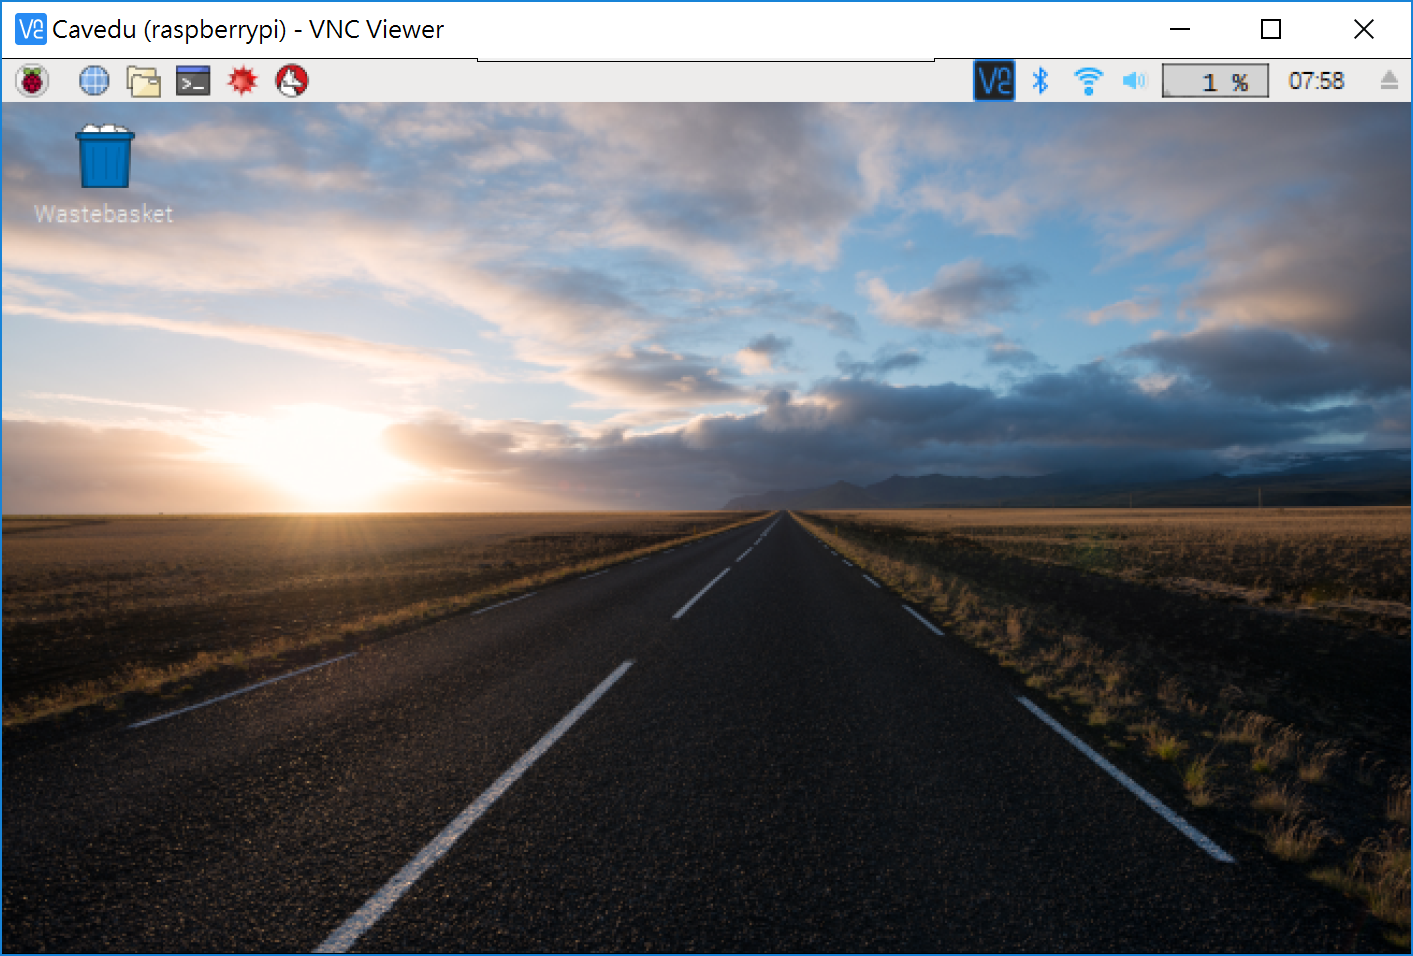
圖26 遠端登入成功畫面[/caption]
相關文章
留言 💬 (0)
還沒有留言,來當第一個。